- Home
- Papercraft Adhesives
- Brayers
Brayer-Tips-and-Techniques
Written and Created by PaperCraftCentral Susan
Do you have a brayer but are not sure how to use it? Here are some of my Brayer-Tips-and-Techniques.
"Ink and paper, paint and paper, you can use it all with a roller in your hand!"
~PaperCraftCentral Susan
When I first got my own little rubber roller I was at a loss about how
to use it. I think this could be a common experience for new crafters.
All of my previous experience with rollers had been house paint rollers.
I tell you, they are very different from this tool, though some of that experience is useful too!
These days it is a handy tool that couldn't be easier to use. I'll tell you what I have learned about it so far.
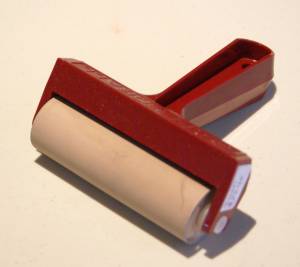
Brayer Use and Cleaning Basics - more Brayer-Tips-and-Techniques
What are Rubber Brayers?
A rubber brayer is a very useful tool for stamping, mixed media and scrap booking
projects.These Brayer-Tips-and-Techniques will help you get a lot out of this little tool if you have one in your stash.
It is a papercraft tool that looks like a small paint roller made of rubber instead of sheepskin.
Because it is rubber, you can treat it like your rubber stamps and use ink or paint on it.
Just as there are many different ways to use stamps, there are many applications for this tool.
Sponge Brayers - more Brayer-Tips-and-Techniques
Sponge brayers are papercraft tools made by Stampin' Up! Here are some more Brayer-Tips-and-Techniques for you about sponge brayers.
These tools are essentially similar but smaller than the rubber one pictured above and the barrel is made of white sponge.
They are more giving than rubber barrels.
You use them the same way though.
To change colours, you snap out the sponge part and replace it with a clean sponge barrel. You can then rinse and clean the sponge barrels with water if you use a water soluble ink.
If you use a lighter coloured ink, it may not look as though the sponge barrel is picking much colour up, but you will find it actually is picking up plenty of ink.
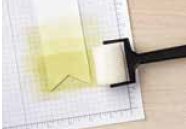
Some of the Ways I have Used a Rubber or Sponge Roller Are:
- To apply paint or ink to large surfaces, both paper and canvas
- To apply layers of overlapping colour to card backgounds
- To ink up large rubber stamps to ensure even coverage
- To apply glue evenly to large surfaces
- To smooth out and flatten freshly glued surfaces (thus squeezing out air bubbles)
- To make a faux torn edge effect with paper for my cards or layouts
- To make an image based on crayon (emboss resist technique)
- To make an embossed image stand out
- To add a sheen with metallic ink or paint
- To add colour behind masked images
- To 'bounce' it across a project, adding lines or rays of colour
To Ink your Roller Up and Use it to Lay Down a Colour:
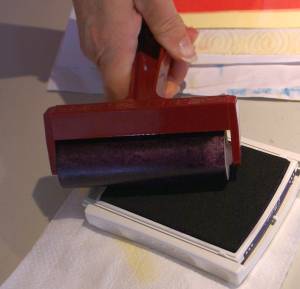
3. Roll the ink onto your paper or cardstock in one continuous motion first, then roll back and forth over the area to spread out the ink and enrich the colour, gaining every bit of use out of your ink and to make the result more even.
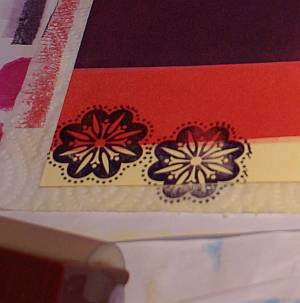
Here I stamped in Stazon over my background after I laid the yellow and red colours down.
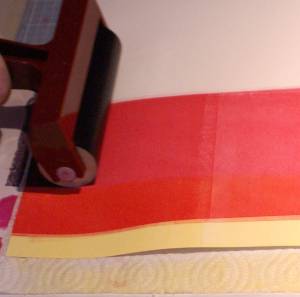
To Load the Roller with Acrylic Paint:
- Choose your colour(s) and squeeze some of it out on some plastic or acrylic surface that is large enough to take the paint and the roller moving over it. I have used ice-cream tub lids, shirt box lids, sheets of plastic wrap, or even a plastic bag spread out flat! The advantage of using a plastic bag is that you can fold it over your paint if you need to use it later, and the paint will still usable for quite awhile
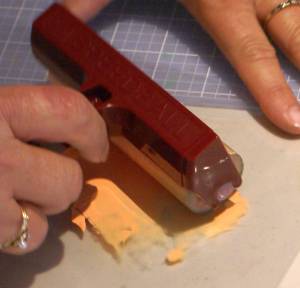
- Spread the paint out with your roller a bit, then push the roller across the paint in one direction, lifting off and returning to your starting point to do it again, much like you would have done with your ink pad. You will be aiming to cover your roller evenly and not leave any gaps of bare rubber left on the roller
- You can then use the roller on your project, and by rolling it back and forth over the area you want covered you will lay down more paint and blend your colours more with each pass
To Overlap Colours:
- Choose the colours you want to overlap
- Start with the lightest colour and ink up the roller
- Apply your colour
- Clean the roller (see how below) and ink up with the next colour, then apply as before
When overlapping colours, remember that two colours mixed together will make a third, so decide if you want that effect or need to lay the different colours next to each other rather than overlapping them. If you want to avoid mixing colours, use a piece of scrap paper as a mask.
Other Techniques to Try - more Brayer-Tips-and-Techniques
- Wrap your rubber roller in rubber bands or string and then apply ink or paint for a patterned effect
- Wrap your rubber roller in bubble wrap before picking up your medium for another type of patterned effect
- Place your paper or canvas on an uneven surface before rolling over it, so there will be random, uneven coverage of your surface
- Roll your brayer onto a multi coloured Spectrum ink pad for a rainbow effect
- Apply ink or paint to an embossing folder with your brayer before running t through your Big Shot with some cardstock. You can get different effects by inking up the raised, convex side, then try inking up the de-embossed, concave side of the folder
- Christine Miller shows Tips For Stampin' Up's Sponge Brayer To Create A Background
- Find out how to make a background with your ink/paint roller
- Find out how to use torn paper and your ink roller to create interesting landscape effects
To Clean the Rubber Roller of Ink:
Here's how to care for your brayers:
- First, run your roller over some scratch paper to take off as much ink or paint as you can
- My Stampin' Up! roller is one that allows me to snap it out of the handle. Since it is rubber, I can then wash it under running water, then apply stamp cleaning mist or Stazon ink cleaner to the rubber and wash it off
- Snap the roller back into the handle and run it over some scrap paper to dry it off and remove any lingering ink traces
- If
you cannot remove your roller, apply stamp cleaning mist or Stazon ink
cleaner to the roller and scrub it off with a stamp cleaning pad or an
old wet washer, turning the roller as you go. Stampin' Up!'s new Stampin' Shammy is ideal for cleaning rubber a roller of ink.
- If your roller is made of foam, you can wash it under running water and use some mild dish washing detergent to remove all the ink and paint possible.
- Squeeze it out and allow it to air dry before storing it away
To Clean the Rubber Roller of Paint:
If you have used paint as a medium, here's how to clean your papercraft tool:
- If the paint is water based acrylic, clean under a running tap
- If the paint is oil based, clean with turpentine or methylated spirits, according to the instructions given by the paint manufacturer for cleaning brushes
- However you clean the rubber roller, I recommend running it over some scrap paper afterward to ensure you have removed as much of the medium as possible and dried the roller off. Otherwise your next project could turn out to be a different colour than you wanted!
Now you have the basics for using and cleaning a brayer, why not try some of the other ways of using it for your next project?
If you don't have a brayer yet and live in Australia, you can buy foam ones from my Stampin' Up! store or click on the catalogue link in the right hand margin.
Read more about my life as PaperCraftCentral Susan here.
I hope you enjoyed the Brayer-Tips-and-Techniques I provided here for you.
- Home
- Tools for Papercrafters
- Brayers


New! Comments
Have your say about what you just read! Leave me a comment in the box below.