- Home
- Papercraft Adhesives
- Cardmaking and Origami
Origami and Cardmaking
Written and Created by PaperCraftCentral Susan
Let's combine Origami and Cardmaking! Learn some basic Origami or paper-folding projects to enhance your handmade cards, scrapbook pages and gifts.
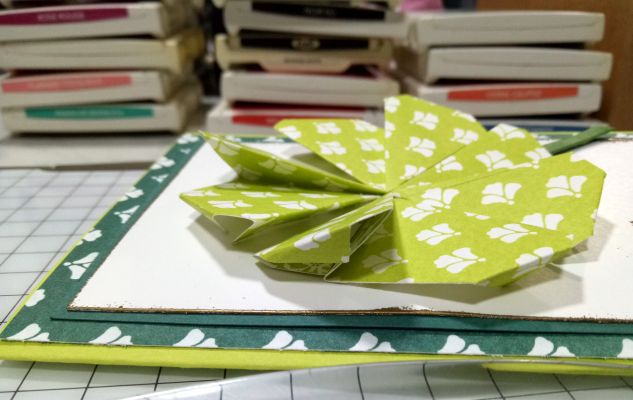
Origami is about making designs by folding paper. Many people have written to me asking about how to make different things using this technique, and I have always said I am not an expert in this area, and that has been the end of the discussion. Now things are changing.
Lately I have started thinking about how origami and cardmaking fit together. I have always admired this type of paper craft. I am interested in using Origami elements on my handmade cards.
Why not learn about it? And why not share what I make with you?
Maybe you will try these projects with me and also share your projects here. I’d like that too. Imagine, a community of papercrafters sharing their folded paper projects and helping each other out with ideas and cleverness….
I think we can make this dream come true!
Making origami embellishments is certainly a great technique for decorating handmade cards, scrapbook pages, and for decorating 3-d papercraft items such as boxes and bags. You could add them to a candy bar card. You can even make a curtain of cranes or butterflies or flowers if you add them to ribbons or twine to decorate a wall or window…
Endless possibilities!
The Meaning of Origami
Origami, from ori meaning folding, and kami meaning paper (kami changes to gami due to rendaku)) is the art of paper folding, which is often associated with Japanese culture. (Google definition)
The Japanese art or process of folding squares of paper into representational shapes. (Merriam Webster Dictionary)
So Origami is all about paper folding. I have twisted it a little to become paper folding for card makers, scrap bookers and paper gift makers.
What is Origami Paper?
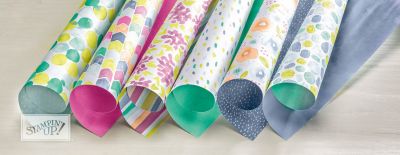
Getting started with this craft means you need to have certain types of papers and squares in particular sizes.
Or does it?
The main characteristic of this type of paper is that it is thin and that it takes a good crease. It is usually only printed on one side. For these reasons, it you can choose the light designer series paper from Stampin' Up! for your projects. This is a 70lb text paper weight or 100-110gsm paper.
If you find any with foil highlights on it, this makes quite beautiful projects. Check this year's catalogues for the latest light designer series papers.
You can use regular designer series paper too for some projects. The two coloured sides can make a striking contrast that could enhance your projects beautifully. I would choose simpler origami projects if you plan to make them from heavier paper though, as the heavier paper will not fold into shape as easily as thinner paper will.
Standard sizes for most projects include:
- 75 × 75 mm (about 3 × 3 inches),
- 6-inch squares (about 15cm x 15cm) and
- 10-inch squares (about about 25cm x 25cm).
The smaller paper stacks from Stampin' Up! just happen to be the 6 x 6 size. Isn't that convenient?
Of course, you can always use your paper trimmer to cut squares of whatever size you desire, if you do not have a convenient paper stack in your stash yet. Cardmakers can use their supplies for origami projects so there is no need ot buy more special tools.
You can also choose to (gasp!) ignore these traditional guidelines and use any size square you desire as a square will still produce a perfectly proportioned origami piece. It's just paper after all, right?
The bigger the square the bigger the finished project, and the converse is also true (smaller squares produce smaller completed projects).
Feel free to customise your projects to suit your purposes.
After all, I won’t be measuring your work!
So if you make a project and it is too large, use a smaller square to make a smaller item, and vice versa.
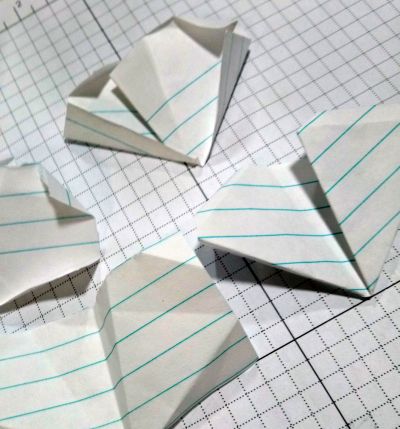
It may help to make a few practice pieces out of ordinary copy paper before you go ahead and use your pretty papers for the final project. That way you can get the size right before you use your good paper.
Remember though, that copy paper is thinner than designer series paper (dsp), so your dsp project will be slightly larger than a copy paper project would be, unless you trim down your dsp a little.
Preparation and Tools
All the tools and supplies you really need is copy paper for practising, designer series paper in a suitable light weight, a paper trimmer or guillotine, and a bone folder.
Traditionalists generally use their own
fingers and thumbs for paper folding, but we card makers and scrap
bookers usually have a bone folder nearby. You can use that to help make
the creased folds nice and sharp, if you want to. I find the projects do turn out better that way especially as dsp is heavier than traditional origami paper.
Preparation: Once you know what size square you want or need to work
with, you may consider cutting quite a few pages to size and storing
them in a box, all ready to be used for a project should inspiration
strike. You could even make yourself a box from card stock to hold your
favourite sized squares.
This would especially be helpful
preparation if you decided you wanted to make a larger project requiring
perhaps thousands of little stars.
Preparation makes the project go
quicker and allows you to take advantage of odd moments in your day
where you could make a few quick figures for a large project, such as
filling up a large glass jar with a thousand paper cranes, each with a
message on them for the lucky and obviously well-loved recipient.
Origami and Cardmaking, and other papercrafts
Often the projects you will make by paper folding will be a perfect size for handmade cards and scrapbook pages.Origami and cardmaking can combine together very well.
Many projects will lie fairly flat on a page, but some will be thicker due to the layers of folds.
Some
will lie flat if you want them to, or have the capacity to stand up and
take on a more three dimensional aspect. I will talk about this
possibility with each project I make for you, listed below.
Sometimes
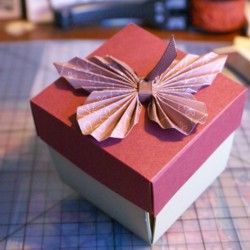
I use an origami embellishment to decorate a handmade paper box or bag.
Then the three dimensional character makes my decorative element even
more interesting. I love to use folded paper butterflies on box tops,
for example. They sit up and have a thickness of their own, as well as
strength. Paper butterflies are harder to crush than ribbon or paper
bows usually are, too.
Little 3-d models are lovely to give as gifts that stand on their own. They make cute work desk embellishments, decorative figures for bookshelves and for anywhere you want a cheery little clever decoration for someone to look at that has been personally made by you!
You can string individual origami creations together to make a mobile, or cover a wall, or to place on a hand made paper wreath. Home decor ideas can often be enhanced by a touch of origami and cardmaking ideas.
As you can see, there are a lot of reasons people like to make origami projects.
Let me
know if you have even more ideas about why this is a good thing to do.
Origami Projects
I plan to keep adding to this list of projects by trying out ideas found on the Origami Resource Centre (among other places) and showing you how I use them in my paper crafting. Exploring that site may also give you inspiration to go ahead and make projects at a time that it suits you to do so.
I will also include paper folding projects I figure out in classes or in contact with other crafters.
If
you do go ahead with new ideas, I would love it if you shared your
projects with me, especially if you use them on handmade greeting cards
or scrapbook pages, or to decorate 3-d items made from cardstock such as
bags or boxes.
Scroll down to find out how to share your ideas anytime on PaperCraftCentral.
Here is a list with links to the folded paper projects that are already available on PaperCraftCentral.com
- Explosion Greeting Card
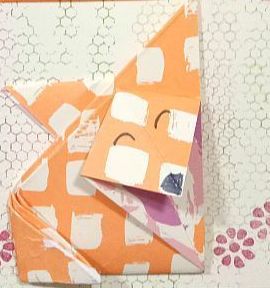
- Fox Birthday Card
- Men's shirt
- Origami Paper Frame - look under August
- Paper ball
- Paper butterfly
- Paper rosette
- Puffy stars
- Rose buds
- St Patrick's Day Origami Shamrock
Remember to combine your love of origami and cardmaking whenever possible.
If you NEED more origami projects right now, this might help you out:
Share Your Project
If
you have made any of the projects listed above, or if you have a
project you made yourself and added it to a card, a scrapbook page, a
bag or a box, or to some other papercraft project such as those featured
on PaperCraftCentral, please do share. We’ll build a collection of
beautiful pages together that way ?
It would be really great if you would provide a photo of your craft as well as a bit of a story about how and why you made it.
Thank you for sharing and for being a part of the community at PaperCraftCentral!
Do you have some suggestions for how you would like to see this site grow?
Do you have some ideas about ways PaperCraftCentral could grow and be more useful for you?
Would you like to see a Stampin' Up! papercrafting technique, product or tool that I haven't featured yet?
Help me build this site by submitting your ideas.


New! Comments
Have your say about what you just read! Leave me a comment in the box below.