Envelope Accordion Album

Written and Created by PaperCraftCentral Susan


An Accordion Album is fun to make. All you need are some envelopes cardstock and some creating time!

Imagine making one and filling it with tags with pictures of your children and grandchildren, your sweetie or your pets. What a special gift for Mother's Day or another special occasion.


"Letters are expectation packaged in an envelope.
~Shana Alexander, American journalist, editor, host and teacher"


One day when I had some time to craft, I gave in to the strongest inspiration to make a little accordion album to house all the lovely contact cards people from a forum I belong to have been giving me.

I cast around in my mind for an idea until someone asked me how they could use up some envelopes in a creative way, and suddenly the two ideas sprang together in my mind, and some hours later here is the result.

I actually used 12 envelopes to make this wallet-sized book.

envelope accordion book

TIP:You can use the number of envelopes that suit YOU. Choose to use six or eighteen or whatever suits your project


You Will Also Need:

  • Twelve envelopes, all the same size, that you can seal shut
  • Ribbon, Velcro dot fastener, other embellishments as desired
  • Cardstock and Designer Series Paper if desired


Money-saving tips


  • Make some original paper flowers to decorate your own keeper once it is made.
  • Consider if you could recycle some envelopes you have been sent in the mail. Some of the writing and stamps could show, but you may like that look.
  • If you do not have enough envelopes of the right size, you can make your own and customise them completely!

How to Make an Envelope Accordion Album:


  • First, seal all the envelopes up.
  • Then measure what you want to keep in the envelopes and cut off one end of each envelope to allow your items to fit comfortably inside and still be able to be pulled out.
  • Make sure the envelopes are all the same length
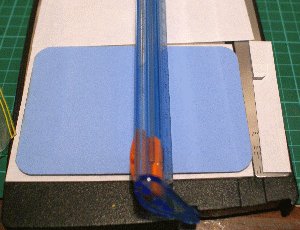


accordion mini book

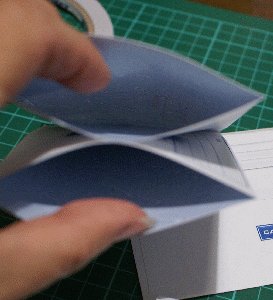
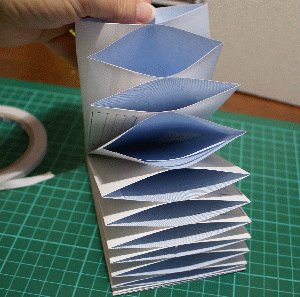
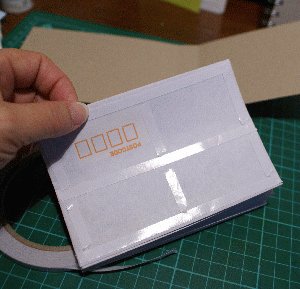
  • Now stack the envelopes together and start adhering them to each other by placing a single row of double sided tape down the middle of one, then sticking it to the middle of another.
  • Keep sticking envelopes together until you have formed your accordion

  • file folder
    file folder

  • Next make a cover for your project.
  • I used Stampin' Up!'s Crumb Cake cardstock for mine. It's a lovely neutral shade.
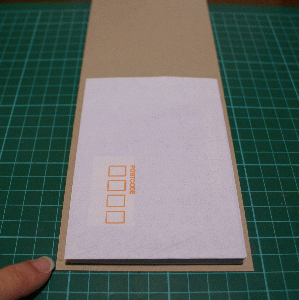
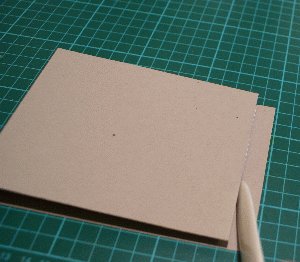
  • Lay the envelopes down on a piece of A4 cardstock and cut a strip lengthwise to fit. Allow the edges of the cardstock to overlap the pockets a little to help protect them

  • accordion book
    • Adhere the first pocket to the back of your cover, using plenty of strong double sided tape or tear 'n tape
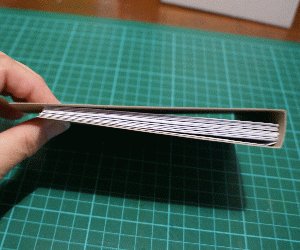
    • Adhere the last envelope to the front of the cover, allowing room for expansion 
  • There's an example of a variation of this accordion album for you to see at Susan's Saga. It is a slightly larger version.

  • accordion book
    mini albums

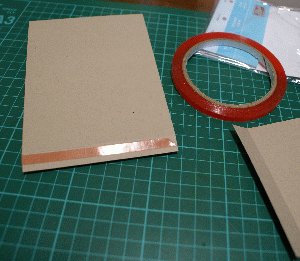
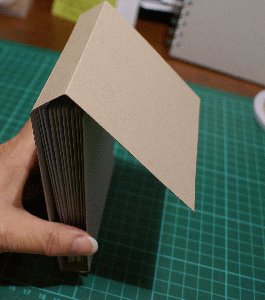
  • Score a line along the top of the last pocket and fold the remainder over, scoring appropriately, to form a flap
  • The A4 cardstock sheet was not long enough to form a proper flap that I liked, so I cut more cardstock the same width and adhered it to the top of the flap with strong adhesive (sticky strip)

  • mini album cover
    accordion book
    mini album

  • Now you are ready to decorate your wallet full of pockets!


  • Stampin' Up! Supplies List for Decorating

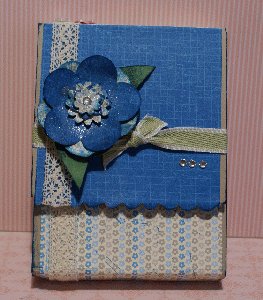
  • I made my own flower embellishment by punching out shapes and spritzing them with shimmer paint diluted in rubbing alcohol, then used Blueberry Crisp (retired) designer paper both to cover the inside and outside of my wallet, then added Old Olive 1/2" grosgrain ribbon and 1/2" Chantilly crochet trim (NLA), with some cute little retired Bitty Buttons and punched shapes to enhance the title along the spine.

  • I inked along the exposed edges with Not Quite Navy ink and also added some of that ink to my flower and leaves (leaves made from Old Olive cardstock).

  •  I finished the whole thing off by adding a Velcro Dot fastener to hold the flap closed and adding some rhinestone bling.
  • I love how it turned out.
  •  I hope you are now inspired to make one of these little Accordion Albums too.

  • And if you make one, please do share how it turned out by using the form below ☺

  • Do You Have Scrapbook Page to Share?

    Please do share your scrapbook layouts and projects below.

    [ ? ]

    Upload A Picture of Your Layout[ ? ]


    Click here to upload more images (optional)

    Author Information (optional)

    To receive credit as the author, enter your information below.

    (first or full name)

    (e.g., City, State, Country)

    Submit Your Contribution

    •  submission guidelines.


    (You can preview and edit on the next page)

    What Other Visitors Have Said

    Click below to see contributions from other visitors to this page...

    Accordion Album 
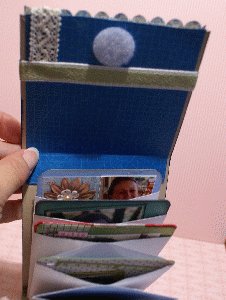
    Hi Susan After seeing your accordion album, I decided to make one of my own. Here's how it turned out. I think it works well for keeping my own contact …
    Click here to write your own.

    accordion album

    1. Home
    2. How to Make Scrapbooks
    3. How to Make Accordion Books

    New! Comments

    Have your say about what you just read! Leave me a comment in the box below.

    Share this page: What's this?

    Enjoy this page? Please pay it forward. Here's how ...

    Would you prefer to share this page with others by linking to it? Click on the HTML link code below. Copy and paste it, adding a note of your own, into your blog, a Web page, forums, a blog comment, your Facebook account, or anywhere that someone would find this page valuable.

    var l = window.location.href, d = document; document.write('<form action="#"><div style="text-align:center"><textarea cols="50" rows="2" onclick="this.select();"><a href="'+l+'">'+d.title+'</a></textarea></div></form>');