- Home
- Papercraft Adhesives
- Anzac Day Wreath
Anzac Day Wreath
Written and Created by PaperCraftCentral Susan
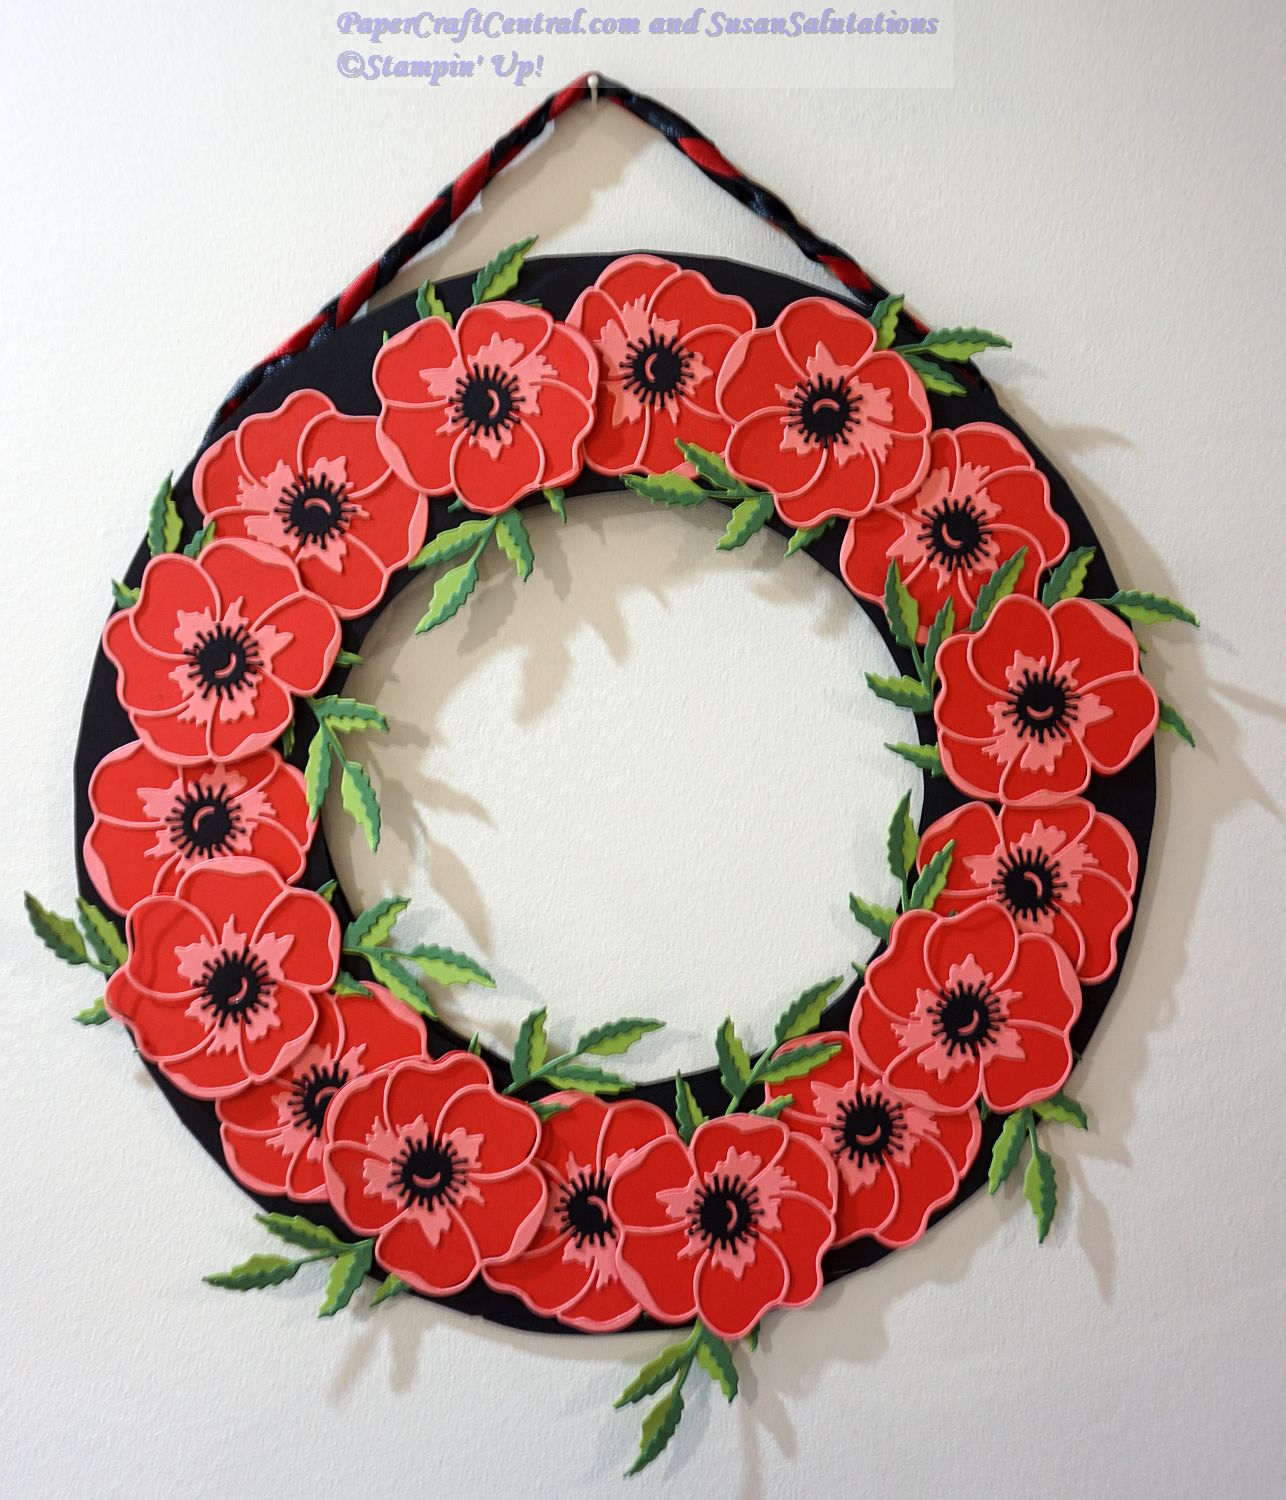
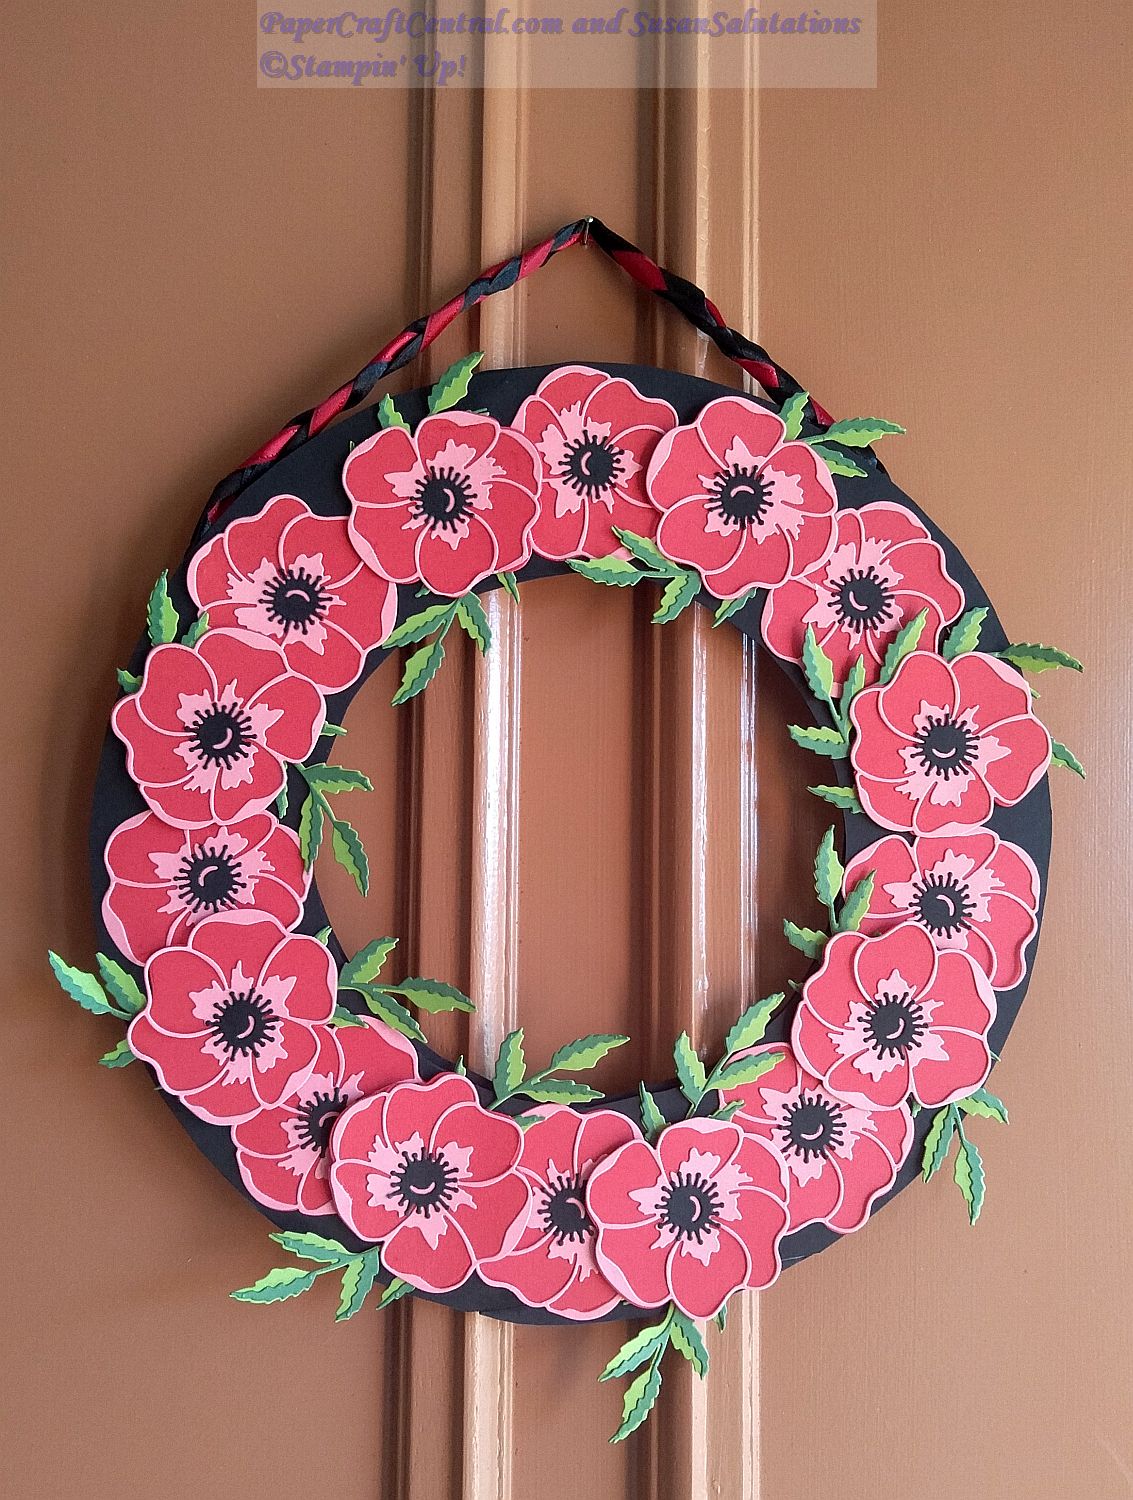
Make an Anzac Day Wreath to honour the special occasion of our Australian and New Zealand fallen Troops on April 25th.
Anzac (Australian and New Zealand Army Corps) Day marks the anniversary of the first major military action fought by Australian and New Zealand forces during the First World War.
You can read more about why the day is important for people in Australia and New Zealand by following the above link to the Australian War Memorial site.
When I saw the Peaceful Poppies suite bundle put out by Stampin' Up!, I knew I needed to make an Anzac Day Wreath to hang on my door in April.
Many people hang wreaths on their fences as a mark of respect, but we don't have a fence, so my door will be the item decorated. That way it will be protected from the weather as well.
I used the dies from the bundle to create my poppies. My wreath measures around 12" in diameter.
Here is a supply list for your Anzac Day Wreath
(If you need to purchase any of these supplies,
you can do so from my online shop at SusanSalutations while they remain
current):
- Poppy Moments dies and die cutting machine
- Cardboard from a 12" x 12" designer series paper pack or cardboard from a cereal box or similar
- A large 12" plate and a 9" saucer for tracing around
- Poppy Parade, Basic Black, Granny Apple Green, Garden Green and Flirty Flamingo cardstock
- Liquid glue (I used Tombow Multi)
- Stampin' Dimensionals
- Pencil, paper snips
- 2 x 18" lengths of 1/4" (1/2cm) black satin ribbon
- 1 x 19" length of 1/4" (1/2cm) Real Red satin ribbon
- Staples and stapler
- A Hot Glue Gun
- Silicone Craft Sheet
Here's How to Make an Anzac Day Wreath
Step 1:
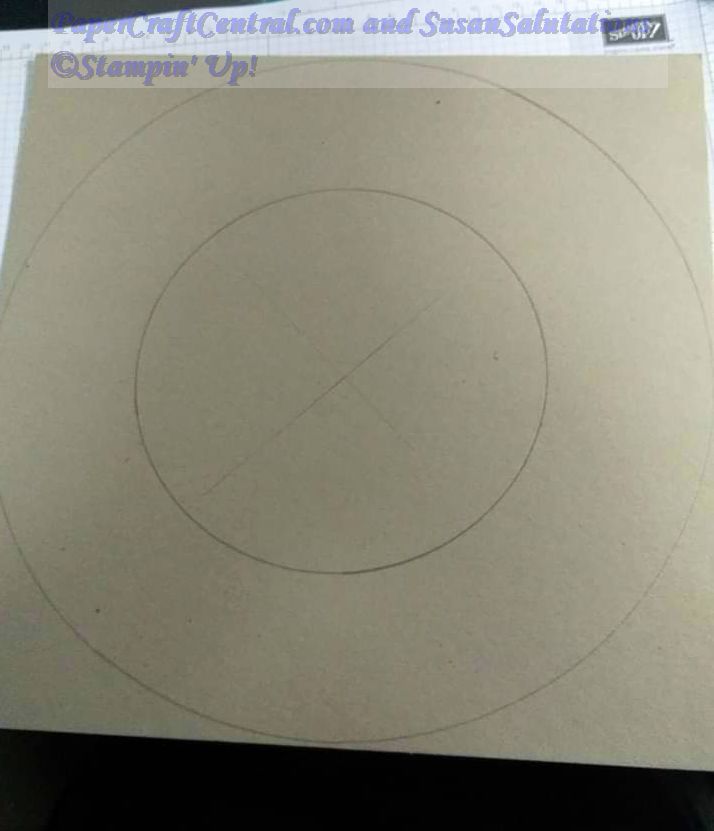
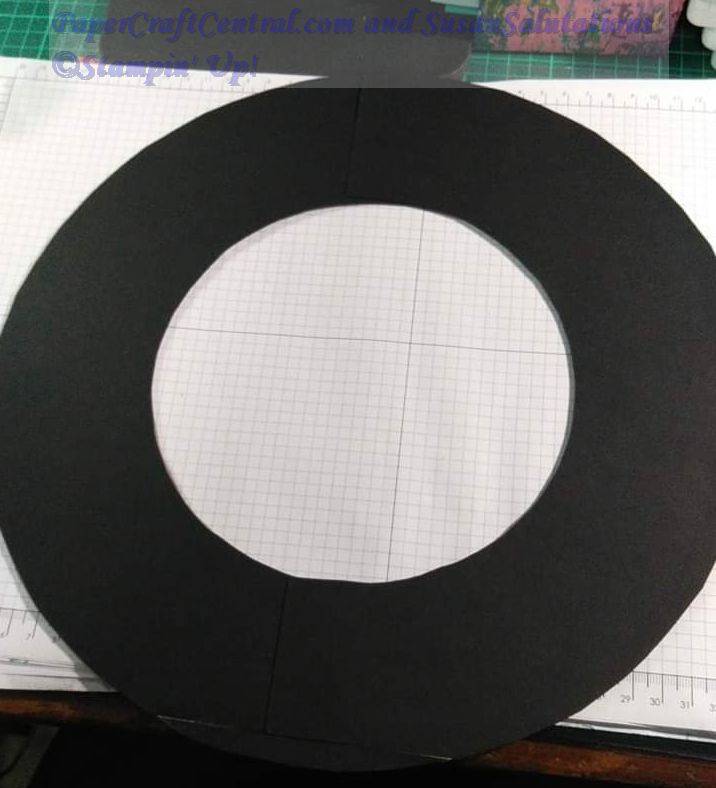
Lay the large plate on your cardboard and trace around it to form the outer circle of the wreath
Lay
the saucer in the middle of the cardboard and trace around it,
checking to see if the saucer is evenly in the middle of the larger
circle
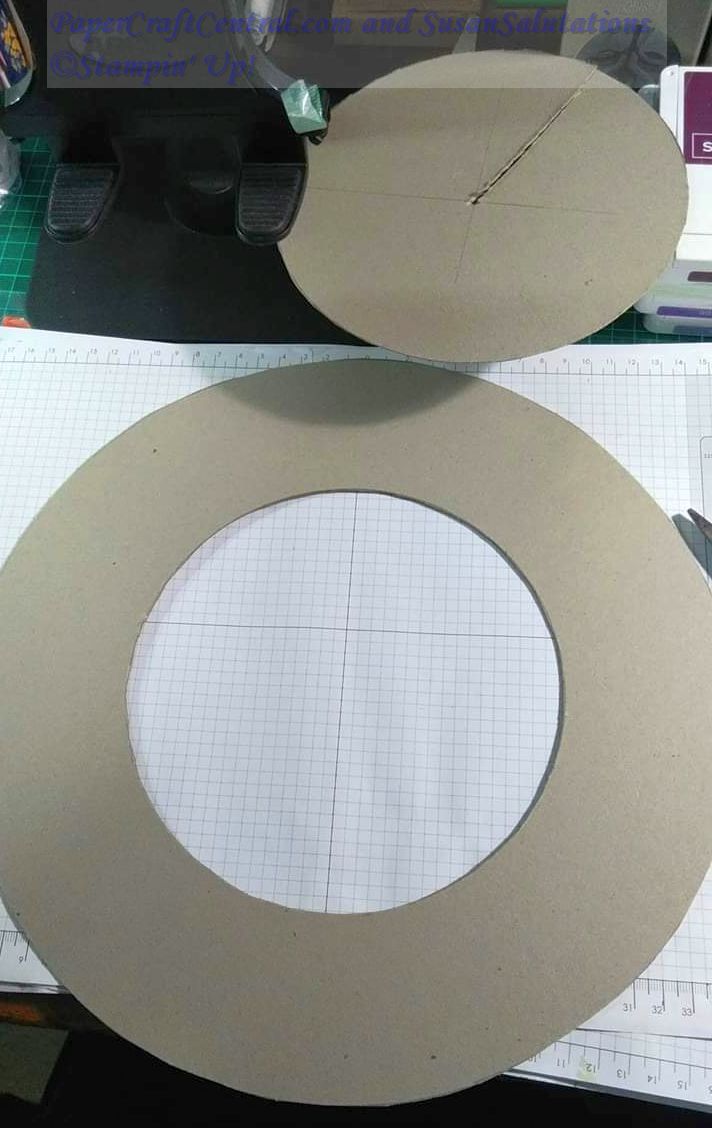
Now cut out your wreath shape from the cardboard
Step 2:
Lay
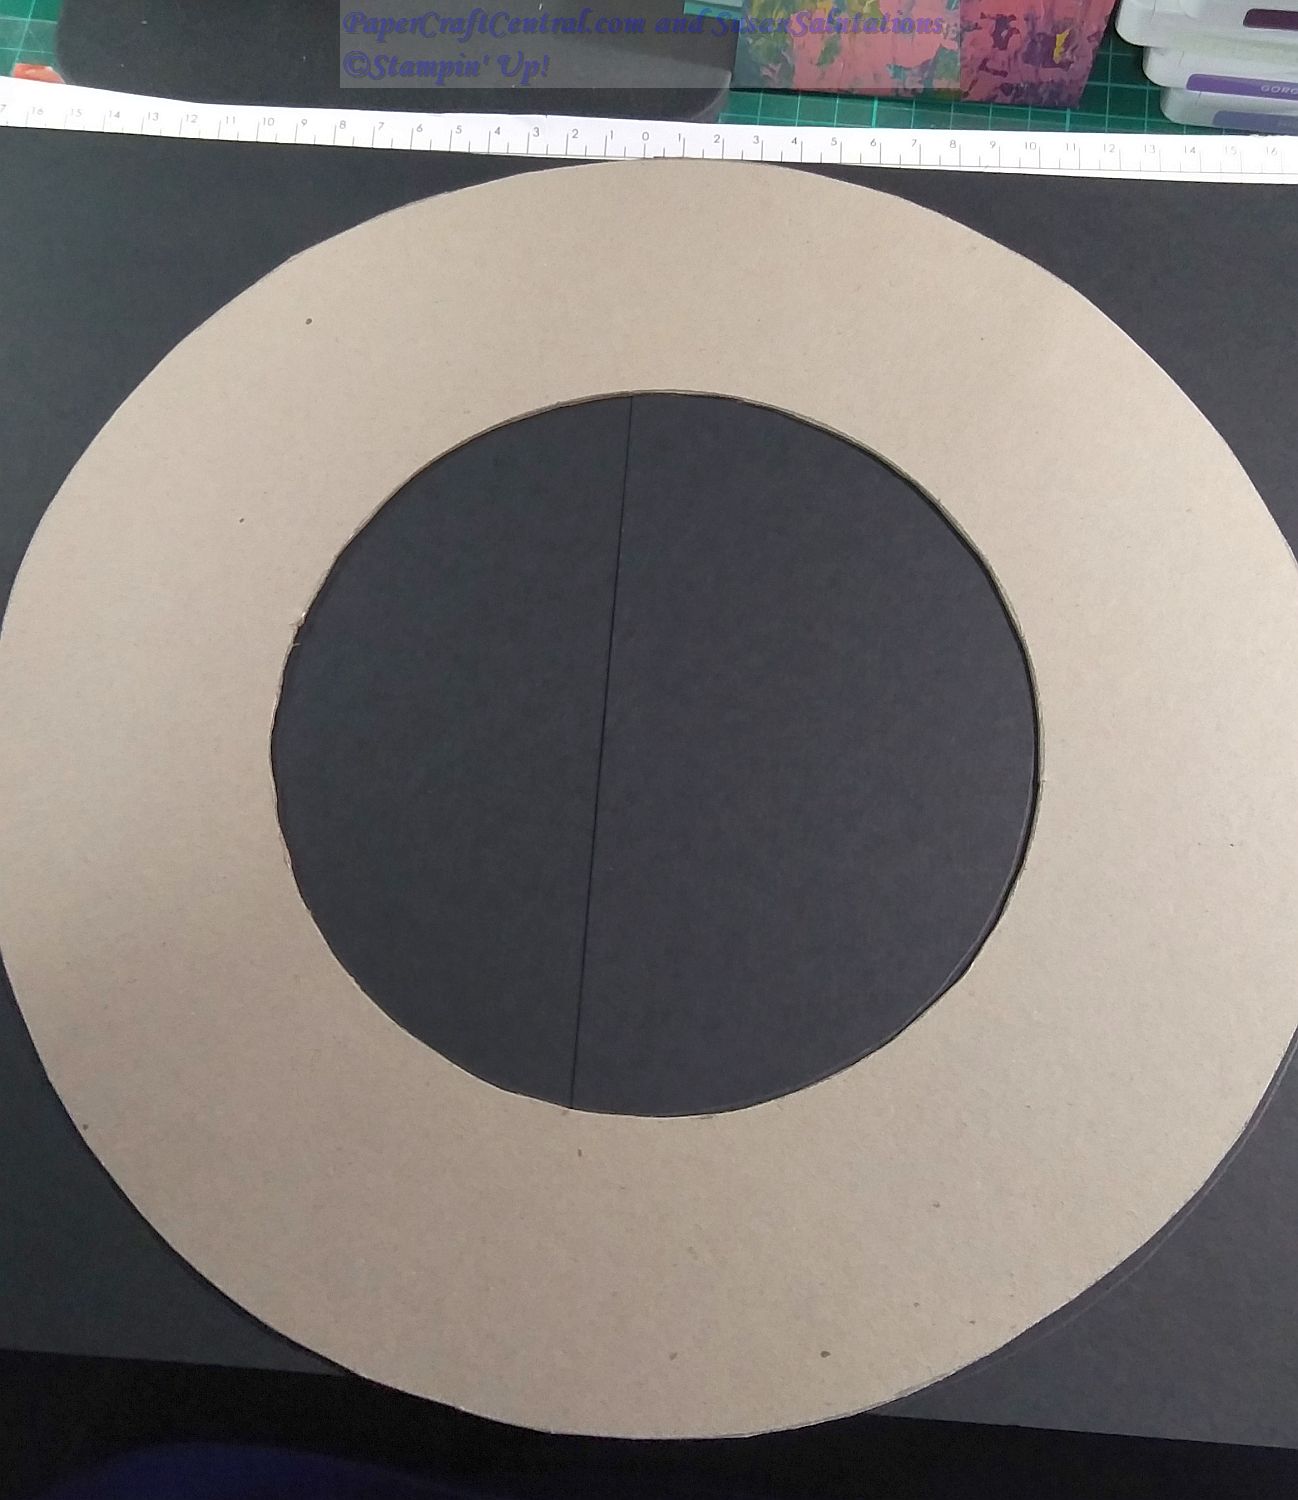
two A4 pieces of Basic Black cardstock under the cardboard wreath.
Overlap the black pieces and glue them together to make the area large
enough to cover the wreath
Trace around the wreath shape onto the black cardstock
Cut
out the shape from the black cardstock. You may find your wreath is
slightly too large to be completely covered. I just trimmed some extra
small pieces out to cover the missing areas then glued the black
cardstock to the cardboard wreath
Step 3:
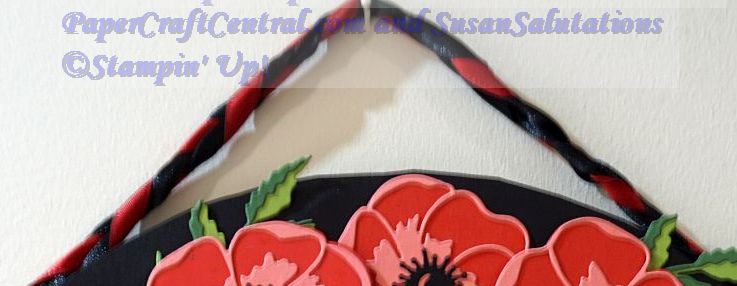
Take the three lengths of ribbon and staple them together at one end to form three strands
Plait the ribbon and staple the finished end
Decide
where you want the ribbon to be attached to the back of the wreath to
make a hanging ribbon and staple the ends in place on the wreath
Step 4:
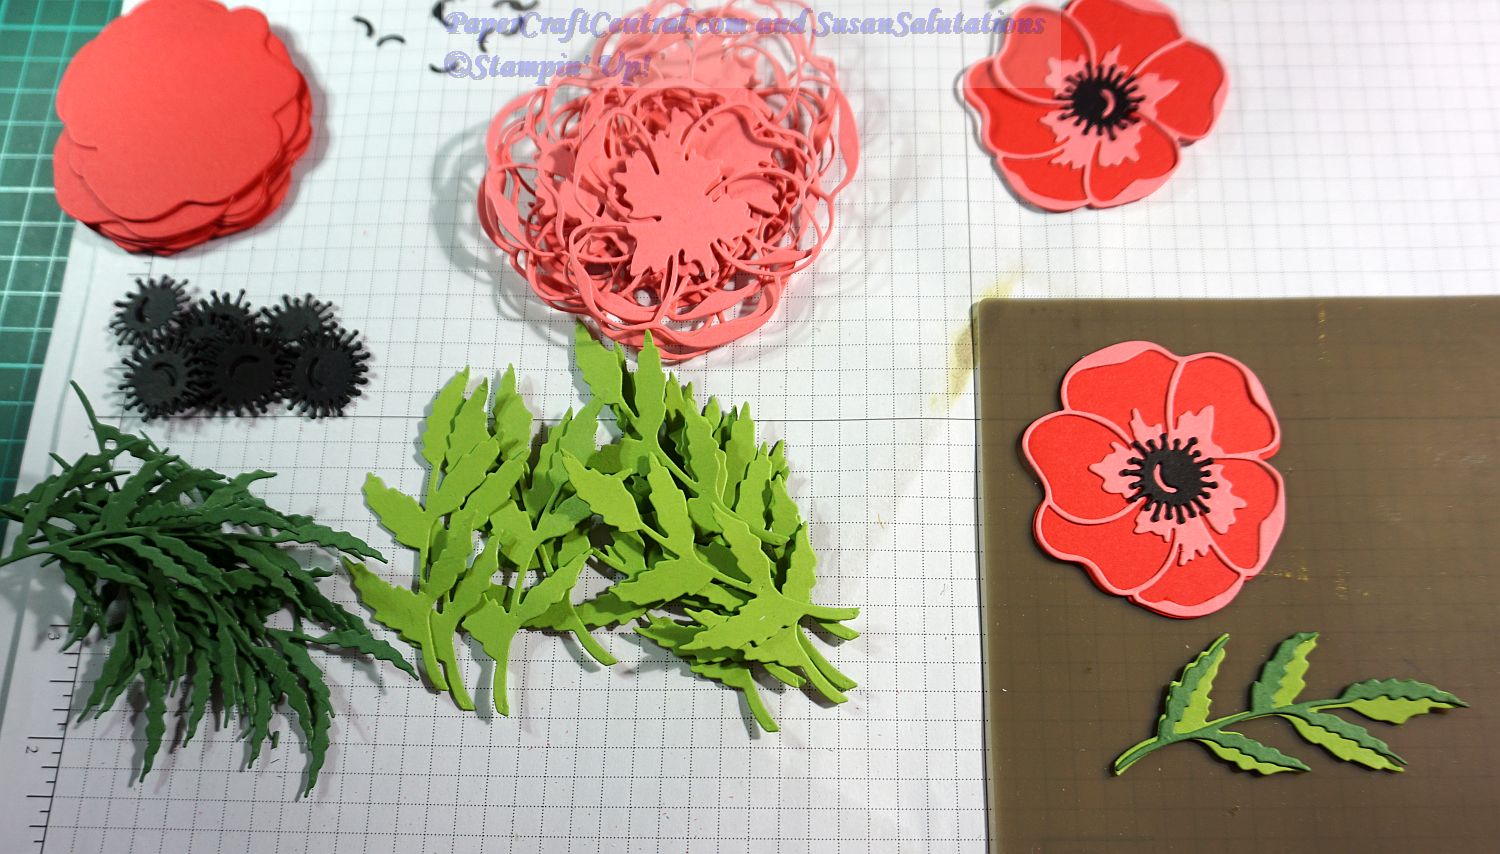
Now
it's time to create your poppies and leaves with the dies and Poppy Parade, Flirty
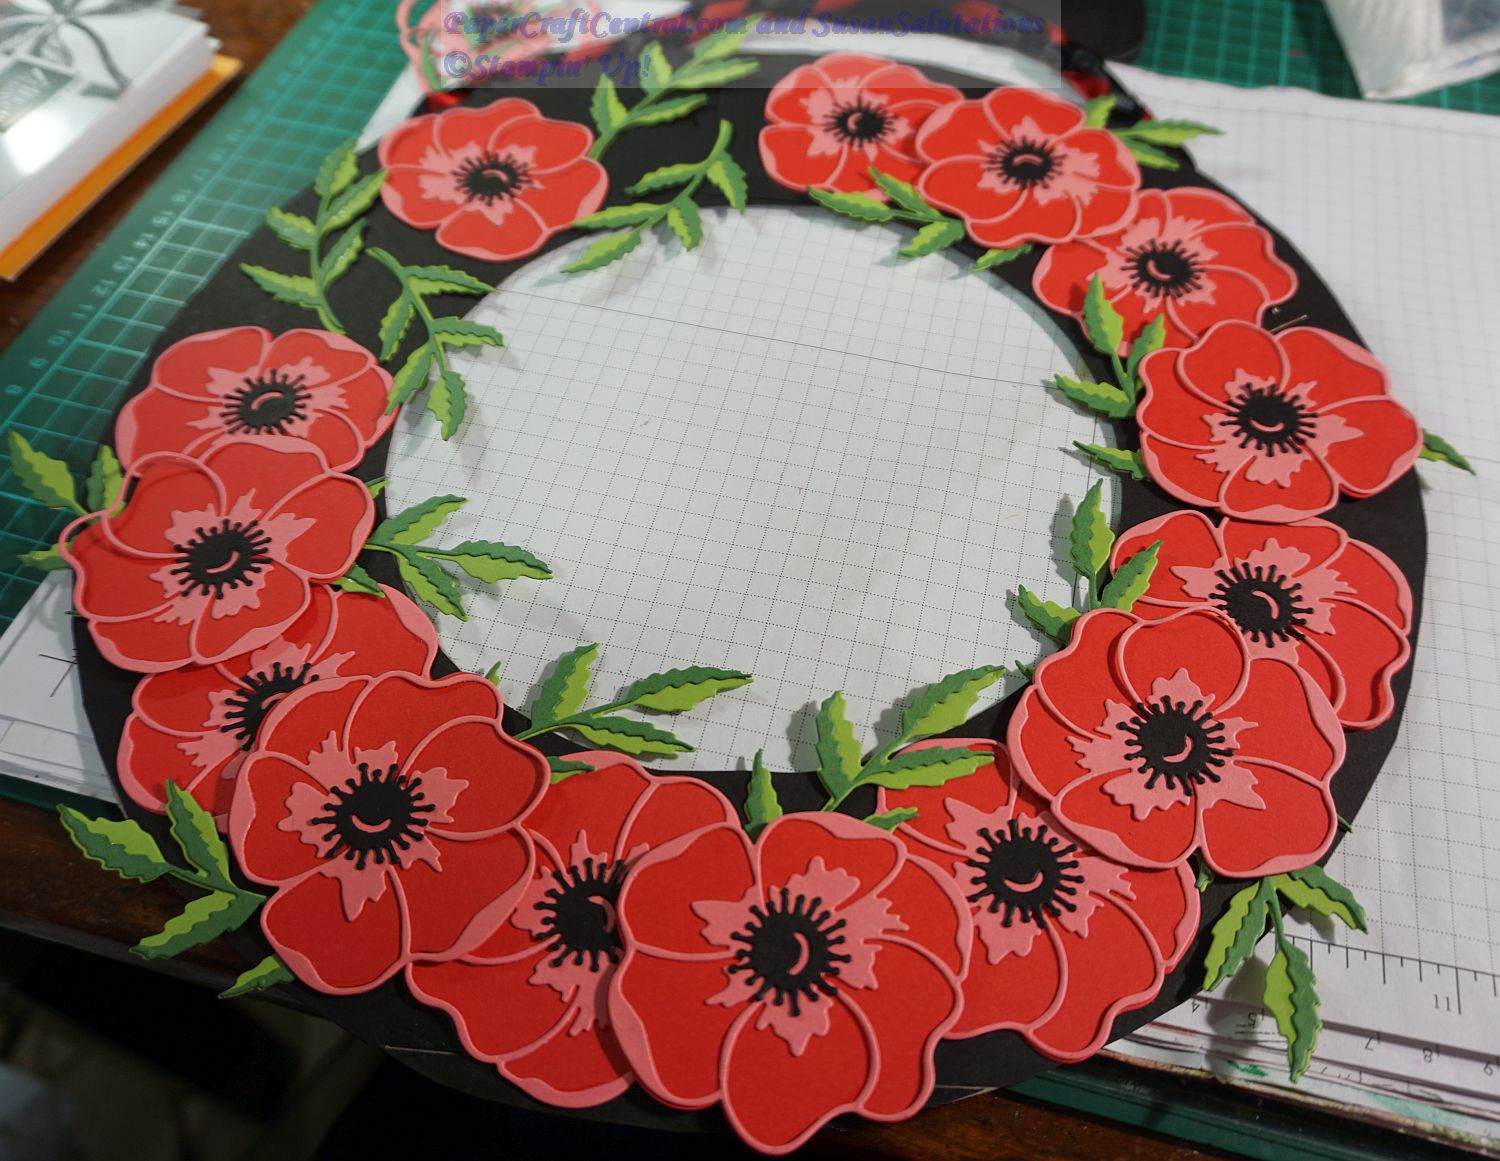
Flamingo, Granny Apple Green and Garden Green cardstock. I made 19
flowers and about the same number of leaves
I find using a Silicone CRaft Sheet while gluing layers together really helps me to keep other things from getting sticky. Glue does not permanently stick to the sheet so peeling the glue dried flowers and leaves off the sheet is easy.
TIP: your Tombow Multi glue to a sponge dauber or sponge and use that to apply glue to die-cut shapes. The glue does not smoosh out so easily when you can apply a thin layer of it to the shapes
Step 5:
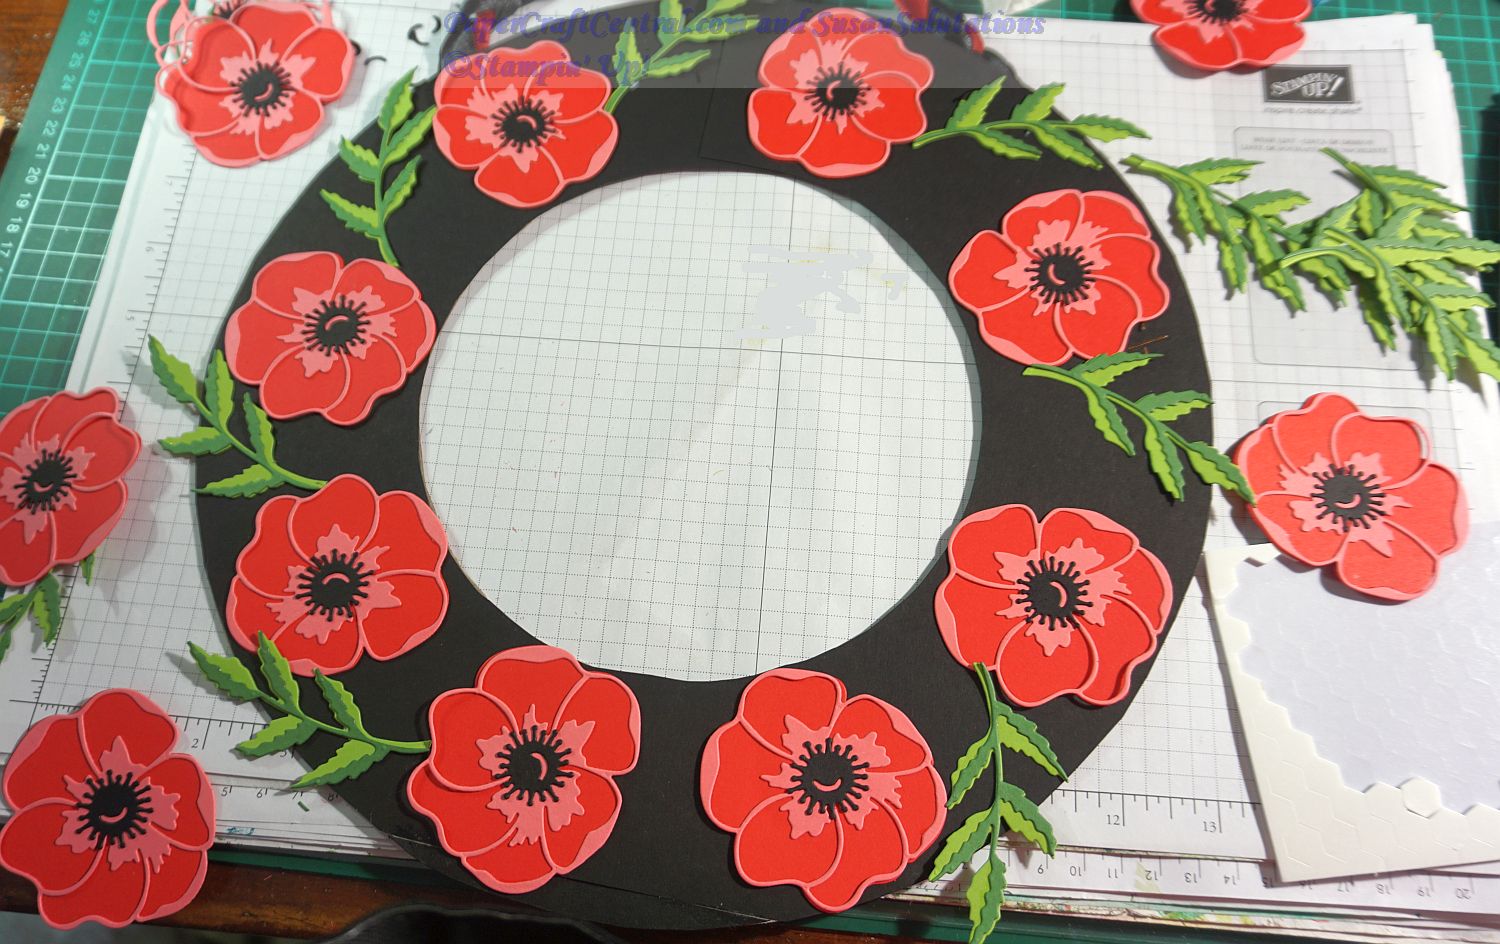
Evenly space out
about half the flowers on your Anzac Day wreath, covering the staples
with flowers if you can. There should be gaps between the flowers. Glue
these flowers evenly around the wreath with Tombow Multi
Add in
half the leaves. I made some leaves hang over the outer edge of the
wreath and some pointed inwards towards the middle. Glue them in place
with Tombow
Now add Stampin' Dimensionals to the rest of the
poppy flowers and adhere them between the flowers you glued directly to
the wreath
Step 7:
To add a bit more strength to my project, I then made a
backing out of two more joined pieces of A4 Basic Black cardstock by
drawing around my plates and cutting the wreath shape out again
Then
I heat up my Glue Gun and attached the new Basic Black wreath shape to
the back of my project, adding hot glue to the stapled ribbon ends
especially
And it was done!
I hope you find a lovely way to commemorate our fallen by making an Anzac Day Wreath.
Of
course, the Poppy Moments dies can be made in any other colours you
choose and be perfect for other wreaths such as ones made for Spring or
Autumn, or any other occasions throughout the year.
I'd love to see your Anzac Day wreath if you make one. Contact Me if you would like to send in a photo.
Lest We Forget
Cards for Troops Drive
If you would like to support our living Aussie Troops by making cards to send to those on deployment to send back home to their families and friends, check out my Cards For Troops Drive. It runs from April to September each year.
Another project you might like is making a decorated candle for Anzac Day.


New! Comments
Have your say about what you just read! Leave me a comment in the box below.