- Home
- Papercraft Adhesives
- Baby Greeting Card
Baby Card 2
Written and Created by PaperCraftCentral Susan
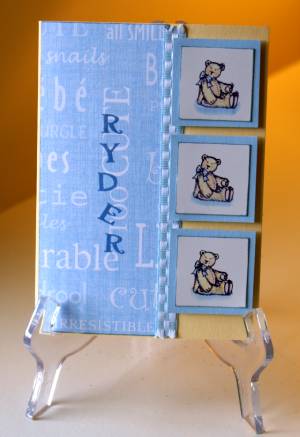
Here's a baby card 2 made with paper punches
"A baby is sunshine and moonbeams
and more brightening your world as never before".
-- Author Unknown

Using Square Punches to Embellish your Card
I have some wonderful little grandsons (and some granddaughters too of course)! Naturally for a papercrafter, a new baby means making a sweet new little welcome card. I found a sketch that is so versatile, you can use it for many other occasions than making a new baby card, but on this page it's all about babies, babies, babies!
The card is divided into two. The sketch I used called for designer series paper on the left and three square embellishments on the right, the two sides to be divided by a fiber.
First, pick your images. In my case I chose teddy bears.
Here's How I made Baby Card 2:
I started by stamping my three little teddy bear stamps onto glossy white cardstock (you can use matte cardstock too such as Basic White) and coloured them in with the Soft Subtle range of Stampin' Write markers from Stampin' Up! Then I punched the teddies out with a smaller square punch and mounted them on larger punched squares of plain cardstock, but you could also use the Stitched Rectangles Dies and just cut them down to squares, or your paper trimmer can make even squares too.I also like using the postage stamp punch to make fancy edges for my squares.
Let me tell you how to create squares from rectangles and send you to a video I recommend for visual learners before we continue on with the baby card 2 instructions.
Sidebar: Cutting Rectangles into Squares

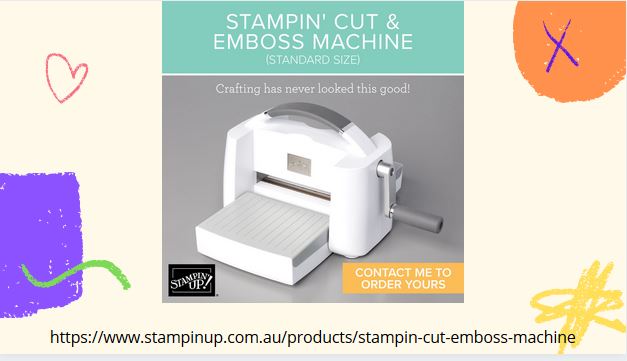
When you have a Die Cutting and Embossing Machine, sometimes the dies are not the shapes you want them to be. For example, your rectangular dies can be cut down to squares, even if they have a fancy edge.
First, run your cardstock through the machine with a rectangular die, cutting it into a rectangle.
Now flip the die around and position it on the rectangle so you are cutting away part of the rectangle to make a square.You won't be cutting into the square itself, just creating a new edge for the square from the rectangle.
Now run the die and the rectangle through your die cutting tool again, cutting away the part of the rectangle you need to remove in order to create your square.
You have a square!
If you need to see a video about how to extend the use of your stitched rectangle dies, there is a video made by USA Stampin' Up! Demonstrator Keep Inking Up! She shows just how to make squares from your rectangles, how to lengthen your shapes, and how to make different types of frames with them too.
I agree with putting your dies on an angle as they will go through your die cutting and embossing machine much more easily than they would if you tried running through a complete edge of the rectangle die. Plus it cuts out that dreadful clunk sound the tool can make when faced with the entire edge of a die. The smallest part of your dies should always go through the tool first. This means putting the dies on angles when you can before rolling the sandwich through the machine.
Remember you can purchase the Stitched Rectangle Dies and a Die Cutting and Embossing Machine in my SusanSalutation Shop if you live in Australia.
Now back to the baby card instructions.
Continuing on with my Baby Card 2 Instructions....
Next I attached a piece of designer series paper to the left hand side of the card front and used individual alphabet stamps to spell out the infant's name. A current stamp set with the full alphabet in it is the Alphabet Photopolymer Stamp Set. After that I attached the ribbon with double sided tape, or you could run it through a Xyron machine to make it into a sticker.
Finally I mounted the square embellishments to the right hand side with Stampin' Dimensionals to make them pop up off the card.
I have used this technique in making a handmade greeting card but you could also adorn a scrapbook page with little detailed stamps mounted on plain cardstock. Use them as accents or make a whole border out of them. The technique would work if you used different images and colours, or even if you small photos instead of stamped images.
Imagine it done in pinks or yellows or lilacs! Even in creams and whites - that would look so classy.
I hope you enjoyed seeing how I made this card to welcome a little one into the world and congratulate his parents. I always make special cards for family and friends.
I must start keeping photos of them as well!
You may also enjoy the following pages:
Return from Baby Card 2 to Special Occasion Cards |Return to PaperCraftCentral Home Page


New! Comments
Have your say about what you just read! Leave me a comment in the box below.