- Home
- Papercraft Adhesives
- Chocolate Favor Box
Chocolate Favor Box
Written and Created by PaperCraftCentral Susan
Create a handmade Chocolate Favor Box for someone you love this Valentine's Day, or on any other special occasion where you need to show someone how much you love them.
I made this chocolate heart box early and am now all ready to give my sweetie something special on the actual day. That makes me a winner already - he he.
Yes, I shall put fresh chocolates in it just before the actual day.

How to Make a Chocolate Favor Box
Here's What You Will Need:
- Three Nested heart templates. I chose a chipboard heart and cut one 1/4" (.5cm) larger and made one 1/4" (.5cm) smaller. Stampin' Up! has heart framelits for the Big Shot that are awesome to use for this project
- Two 12" pieces of cardstock to form the base and the lid. I chose Real Red.
- Designer series paper and embellishments of choice
- Double sided tape or Flex
- Pencil, paper snips, other papercraft tools of choice
- Wrapped candy or chocolates
Here's What To Do:
Let's prepare the sides first:
Cut two strips of cardstock to be the sides of your box. I made mine
3.5cm (1 1/2") wide but you can make your box sides shallower or deeper
to suit your own purpose. It will help to measure how tall your candy is
before deciding how deep to make the container.
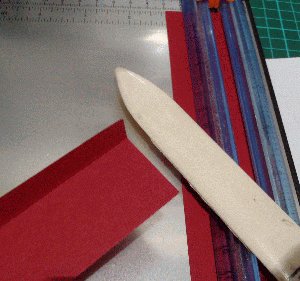
Score 1/4" (.6cm) along one side of each strip and fold and crease well. Decorate one side of each strip if desired
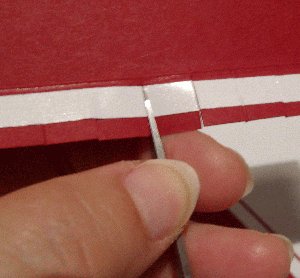
Apply double sided adhesive tape along the scored tab, on both sides. Leave the backing paper on for now. Cut 1/4" (.6cm) tabs along the folded edge and set aside.
Box Base and Lid Instructions
Using your nested hearts, cut the following out of cardstock:
- Four of the largest hearts
- Seven medium sized hearts
- Three smallest hearts
Once they are cut out, do the following:
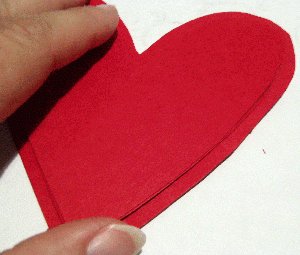
- Adhere two of the largest hearts together. Adhere the other two together likewise.
- Make two sets of three medium sized hearts, adhering them together. You will have a single heart left over for now.
- Adhere the three smallest hearts together.
- Adhere the smallest set of hearts to the middle of a medium set of three hearts to form the insert for the lid.

Now take a box side and score one end of the strip to make a 1/4" (.5cm) fold. Remove the adhesive covering from the side of the strip that will stick to the box base.
Fold the strip back so it will fit in the centre of the heart like this:

Fit the tabs to the bottom of the box all the way to the base of the heart. Score a 1/4" (.5cm) line at the heart base and fold it so the wall of the box follows up the other side of the box. Trim the end if the strip is too long.
Now take the other prepared wall strip and place some double sided adhesive tape on the end to attach it to the tab at the base of the heart. Continue to build the wall of the box all the way to the center of the heart, adhering down the tabs as you go, like this:

Where the two sides join in the top middle of the heart, adhere the loose side to the tab left by the first side, cutting away any tabs that won't tuck under properly at the top:
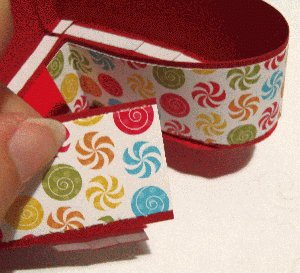
Remove the adhesive backing from the inside of your chocolate favor box and insert the last single medium sized heart to become the inside box bottom. Smooth it down inside with your bone folder so it sticks well to the tabs and hides them.
You will find the heart box takes a better shape after you insert this layer inside.
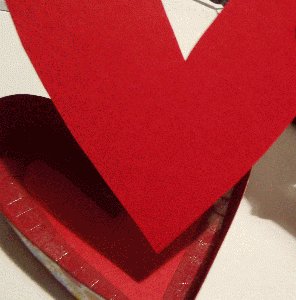
Now adhere the final large heart set to the box lid and decorate it. I added gathered ribbon, a glitter heart, and hand made paper flowers to mine.
Fill with chocolates or candy.
You are finished!
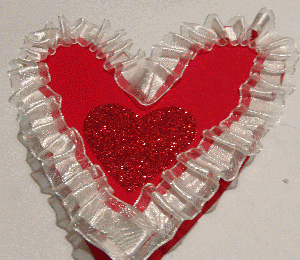
I hope you will try making your own chocolate favor box now. I would love to see one in browns and creams, or a white and yellow one, or a pink and red one, or a shades of blue and green box....have fun making one and do be sure to come back and show me your finished creation.
Do You Have A 3-d PaperCraft Project To Share?
Do you make 3-d PaperCraft items? I'd love to see your work. Please do share below.


New! Comments
Have your say about what you just read! Leave me a comment in the box below.