- Home
- Papercraft Adhesives
- Decorating Tin Cans
Decorating Tin Cans
Written and Created by PaperCraftCentral Susan
Decorating tin cans can be a great way to recycle and create some special altered art at the same time.
"When life gives you scraps,
make something with them!"
~Unknown
Decorating tin cans can be such fun. For example, have you ever wondered what to do with your empty Pringles (potato chip) cans? They seem too good to throw away, do they not? They have nice solid sides and a top that seals. If you need a container to hold small items or give away as a gift, Pringles cans can be just the thing.
Plus it gives you can excuse to buy some, just in case Pringles are your favourite snack food!
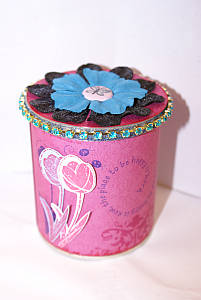
Instructions for Decorating Tin Cans
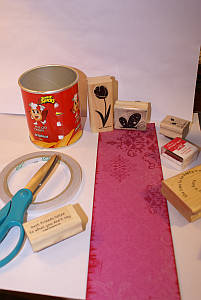
First, buy a tin can of Pringles or similar.
Next, have a nice snack time and eat or store your potato chips or other food safely.
Then wipe the tin out with a clean, damp rag a few times so that no salt or oil remains on it or on your fingers. Allow it to dry thoroughly.
Now you are ready to begin the fun papercraft part..
There's a way to share your own decorated containers at the bottom of this page. Scroll down to see!
Now, gather your supplies.
You will need:
- Cardstock or designer paper of choice
- Strong Double sided tape (Tear & Tape Adhesive is strong) and some Stampin' Dimensionals
- Decorative elements such as flowers, buttons, brads, lace, ribbon, sequins etc(See here for other kinds of embellishments)
- Stamps and stamping supplies of choice, if desired
- Your choice of paper craft tools
Here is How I Made My Decorated Tin Can:
- Cut cardstock or designer series paper to fit the sides of the tin. You want it to be as wide as the body of the tin and able to overlap on the edges when you wrap it around.
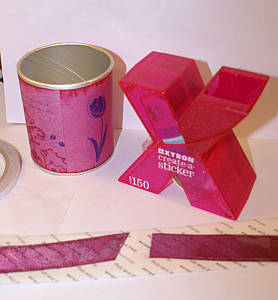
- Decorate your cardstock as desired before you adhere it to the body of the can. Here I used some Stampin' Up! flower stamps and then I stamped a few more on different coloured cardstock, cut them out and adhered them over the original stamps to make a 3d effect.
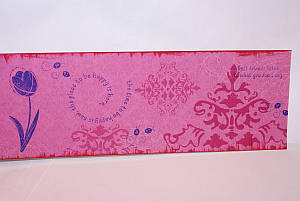
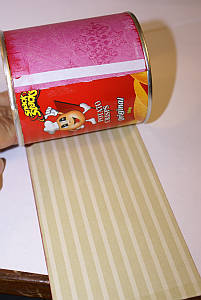
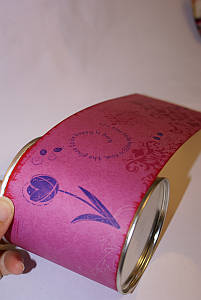
You have now completed decorating the body of your can. Next turn your attention to the lid.
As the lid is plastic, it is easy to cut through it with a paper punch and is no match for the Crop-a-dile.
Here's what I did:
- I cut a circle of cardstock to fit the top of the lid
- I decorated the lid by punching holes through the centre and inserting a silk flower or two with a decorated brad to hold it there
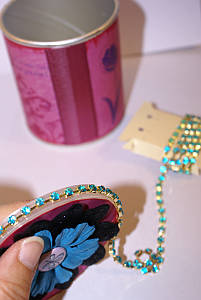
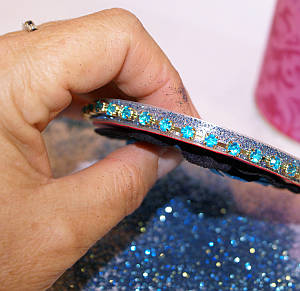
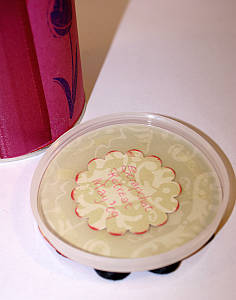
I started decorating tins when I took part in a scrapbooking swap where we exchanged them. I filled the can up with all manner of scrapbooking goodness. It was a fun swap!
Now you can look at your pantry and even your laundry or wardrobe anew to see if there are any containers that could be repurposed and gifted in this way. I have decorated other things than tin cans, such as sturdy or plastic chocolate boxes, strong boxes that hold dry goods, pretty packaging that comes with jewelry or clothing. These days it pays to repurpose and recycle, so why not do that in a creative way and have fun at the same time?
Have you been a decorating tin cans too? I would love to see it. You can add it by typing in the spaces below:
Do You Have A 3-d PaperCraft Project To Share?
Do you make 3-d PaperCraft items? I'd love to see your work. Please do share below.
What Other Visitors Have Said
Click below to see contributions from other visitors to this page...
Flower Pots for Houseplants, and a Card Idea Not rated yet
I made a flower pot. if you have a large can cut the side and trim to a good size for a flower pot. Then just glue a strip a paper on the outsides and …
You may also enjoy the following PaperCraftCentral project ideas:


New! Comments
Have your say about what you just read! Leave me a comment in the box below.