- Home
- Papercraft Adhesives
- Distressing Paper
Distressed Paper
Written and Created by PaperCraftCentral Susan
The distressed paper technique can add both dimension and interest to your scrapbook pages and handmade greeting cards.
"One may survive distress, but not disgrace"
~Scottish Proverb
Do you like adding texture to your scrapbooking layouts and cards? If
you haven't already met the Distressing Tool, this is your lucky day!

What is a Distressing Tool?
This card making tool is one of the handiest little gadgets around.
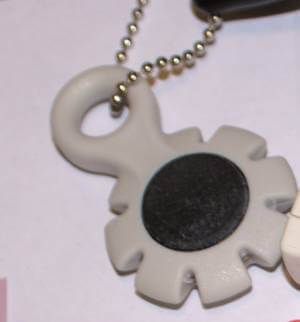
The one I have is from Stampin' Up! (sadly, it is No Longer Available) and is shaped like a circle with notches cut out of it. It has a soft button in the middle that makes gripping the tool easier when you want to rough up your cardstock or designer series paper.
It came with three other cutting and scoring tools which makes it very handy indeed. It's a pity it is retired, but you can see what sort of tool to look for out there in the craft stores.
Many makers make these tools. Make sure you look for one with a few options that you can use. Some blades will be finer than others. You might like those for your card making projects, but you may like a chunkier look for your scrap book pages or off the page projects, for example. It all depends what type of crafter you are, what tool will suit you.
All of these types of tool have razors built into them so you can distress your paper safely and thoroughly without cutting your fingers. They should also be safe to leave unattended for a short period, in case children are nearby, but I would be sure to store them away from children's reach anyway, just in case.
Some of these kinds of tools only have one notch, and I wonder if the razor edge would lose its sharpness quicker than the multi-notched ones? That is something else to look for. Some tools may have replaceable blades as well. You might like to consider how much distressing you intend to do, and choose a heavier duty tool if the volume is likely to be high.
Having one like the Stampin' Up! one with more razor surfaces to work with is a definite advantage, in my opinion. You can be sure a tool with multiple blades will last you longer than one with a single blade, depending on the hardness of the steel in the blade.
How DO You Create Distressed Paper?
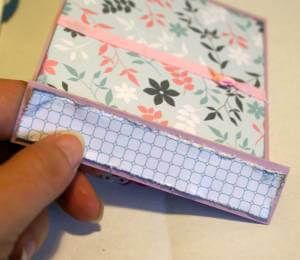
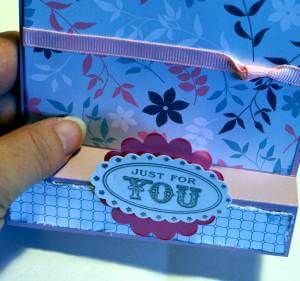
You can use the distressing tool to get the look shown below. I also give you some tips about what to do if you do not own one of these tools yet.
In the middle of the notched circle of my tool is a sharp razor edge that can be used to make the distressed edges on your paper.
NOTE: If you are going to ink the edges of your paper, you may want to ink them before you distress the edges. Try inking after you have roughed the paper up as well to see if you like that effect better.
Here's what to do:
Take the tool in your hand and run the edge of your paper or cardstock through one of the notches so that the razor edge scuffs the paper as you draw it through the tool.
You will wind up with a slightly curled,
frayed look.Or you can really go to town on the edge of the paper and rough it up even more. The more you rough it up, the more likely the paper will tear, however, so be aware of the limits of the cardstock you are using.
Of course you can also achieve this look in other ways.
You can try using your fingernail
against the edge of the paper and roughing it up that way. I sometimes
use that method when I want a more random look to my embellished edges. A
tool makes things quicker and there's less stress on your fingernails,
though. Someone once told me my fingernails should be jewels, not tools. (They weren't a papercrafter though. Lol!)
So you could try using Paper Snips blades to get the distressed paper effect instead, but be careful not to cut yourself.
Even a dull butter knife could come to the rescue for you. I found a cute little one at a charity shop once and it has lived in a drawer of my craft desk ever since.

Using this technique is a great way to add texture and interest to your scrapbooking pages, handmade greeting cards, ATCs and 3-d paper craft projects.
If you haven't already tried it, why not give it a go?

Now you may like to try one of my other Papercraft techniques such as:


New! Comments
Have your say about what you just read! Leave me a comment in the box below.