- Home
- Papercraft Adhesives
- This Page
Embossing techniques using embossing folders and Big Shot machine
by Kristy Marshall
(Kingaroy, Queensland, Australia)
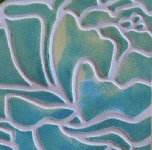
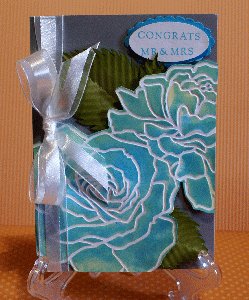
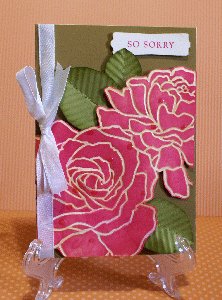
Embossed Manhattan Rose brayered with ink colours
I love card making. Actually I am CRAZY about craft making. One technique that I have always found stunning. I know there are a number of ways to use embossing folders to get a range of fantastic effects but I haven't mastered this yet and I would love to see some of your techniques and hear some of your experiences with embossing folders and machine eg Big Shot
Thanks heaps
Kristy XoX
Hello Kristy
Thank you for your excellent question! I love my Big Shot machine too and there are some amazing things you can do with it and embossing folders alright 🤗 There are too many to write about in one reply, but here is a favourite one of mine that uses a brayer.
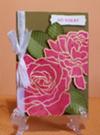
The technique I have pictured for you is made this way:
1. Emboss your image by running cardstock through the Big Shot with your chosen embossing folder. Lay the image on your craft space with the raised edges down (the de-embossed side)
2. Take a brayer and ink it with a light colour. I used So Saffron in both of the cards shown
3. Lightly roll the inked brayer over some of the image to create highlights
4. Clean your brayer (or use another one) then ink it up with a darker colour. I used Baja Breeze in the blue card and Melon Mambo in the pink card
5. Gently and lightly roll the new colour over your de-embossed image till you like it. Try not to cover up all the light yellow, leaving some of it as highlights. Where you mix the two colours it will form a shade of green (for the blue card) and orange (for the pink card)
6. Trim your embossed image and use on your card
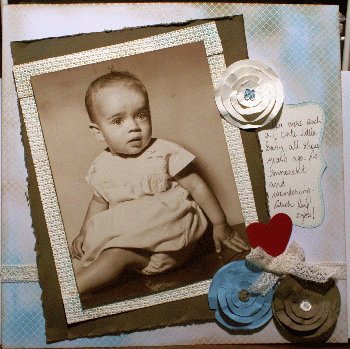
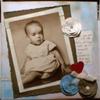
I use this technique with scrapbook pages too, as shown in the baby picture above. For that frame, I lightly brayered over the embossed side, not the de-embossed one.
Some other ways to use your embossing folders are shown in this series of Cupcake cards.
Did you know you can also add colour to your embossing folders? Run your ink pad over the de-embossed side of the folder (use a water based dye ink so it will wash off later) then carefully lay a piece of cardstock over the inked side and close the folder. Run this through your Big Shot. Your cardstock will have colour in the valleys of the image but not on the embossed ridges. Wow! I like that method too.
Maybe some other readers will add their own fun ways of using their Big Shot machines and embossing folders here too 😃
I hope to hear from you again, Kristy, and would love to see some of your work after you try these techniques out.
Happy crafting!
Susan
www.papercraftcentral.com
PS Here are a couple more embossing folder techniques:
Faux Flannel Blanket
Big Shot Techniues
Comments for Embossing techniques using embossing folders and Big Shot machine
|
||
|
||
|
||
