- Home
- Papercraft Adhesives
- How to use Heat Tools
How to Heat Gun
Written and Created by PaperCraftCentral Susan
Ever wondered how to heat gun? I wrote some tips and a tutorial for you below.
"It's no delay to stop to edge the tool"
~Irish saying
Have you been a little intimidated about using a heat gun? Let me help
you understand a little more about this useful tool and maybe you will
want to add one of them to your craft supplies or break it out a little more often if you already own one.

What are Heat Guns?
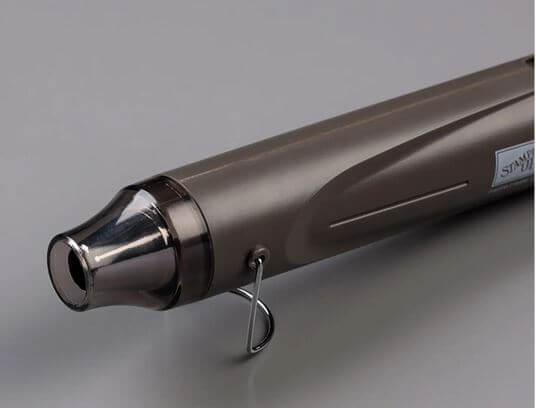
Heat guns (or Heat Tools) are pretty much essential tools for papercrafters.
They are slim tools that are built with the safety features of a hair dryer, having a safe plastic body to hang on to and a nozzle for directing the super hot air.
They remind me of the shape of an electric drill tool or a straight hair dryer.
Incidentally, you can buy a Heat Tool from me if you live in Australia by going to SusanSalutations. It is listed as being a heat tool on the site.
How to Heat Gun - Tutorial
Basically, if you can use a hair dryer then you can use one of these craft tools.
The temperature generated by the tool is higher than that of a hair dryer though so please don't try drying off the family dog with it after you have bathed him or accidentally directing it at someone's face or eyes.
And do keep it out of the reach of young children or supervise older children while using it.
What can they be used for?
Having a nice, hot, dry stream of air to focus on your papercraft projects can be extremely useful at times.
The most common way to use a heat gun is probably for heat embossing. This technique is one of my favourites, as I am sure you have discovered from browsing this site.
Other Ways to Heat Gun are:
- Softening the glue behind your rubber stamps, for when you want to take them off their wooden blocks and use them as clear mount ones
- Drying things out on your papercraft project when you are in a hurry (such as when you have glued your faux silk to some cardstock. Be careful not to get the heat source too close to the tissue or it might change colour or scorch)
- Drying other things such as distress inks, glitter glues, watercoloured images, shimmer paint, etc
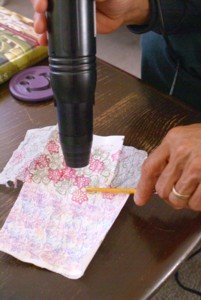
- For shrinking some shrink plastic embellishments (shrinky dinks). When you use it for this purpose, make sure you hold your image down with a pair of tweezers or a wooden stick to avoid burning your fingers or allowing the image to be blown away of course
- You can apply glitter with this tool and also paint the cooled adhesive
How to Heat Gun
It's pretty simple:
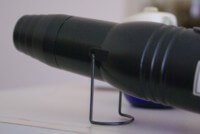
- First, plug it in and if it has a stand, set it on that by folding it out from the main body of the tool.

- Next, prepare your papercraft project to the point where you need to melt or dry something out.
- Now pick up the heat gun and turn it on, pointing it toward the ceiling or away from your project. Allow it to run for a few seconds so it is properly heated up.
- When it is hot, hold your papercraft project securely in place with tweezers or a wooden stick or similar and bring the hot stream of air onto your project.
- Hold the heat gun more than 2cms (1") from the object you want heated and move it slowly over the surface of the item.
- Sometimes you can hold the tool further away and get a wider scope of air across more of your project.

- When you have achieved the effect you want, turn off the heat gun and replace it on its stand.
- Turn off the power source and unplug the gun.
- Safety Note: It will stay hot for a little while so don't burn yourself.
You're done! Now you know how to heat gun!
Features of the Stampin' Up! Heat Tool
If you heat emboss, you'll need a heat tool. It melts embossing powder and helps wet ink to dry more quickly. The Stampin' Up! Heat Tool is slim, sleek, quiet, and easy to hold.
* It has 2 heat settings: low for drying ink, high for heat-setting powder
* It also has a protective plastic tip to cover the hot metal end, so it is safer. You will have less chance of being burnt by it or of overheating any surface you lay it down on.
TIP: You may be tempted to try using your paint stripping gun instead of a heat gun, but unless you are very, very careful, a paint stripping tool can be dangerous with paper. The Stampin' Up! Heat Tool is specifically made for use with papercrafting projects. I recommend you using this specific tool instead.
PS: You can buy one from me in Australia if you need to add one to your craft stash.
Be sure to check out the other papercraft tools I review for you.


New! Comments
Have your say about what you just read! Leave me a comment in the box below.