- Home
- Papercraft Adhesives
- How to Make Envelopes
How to Make Envelopes by Hand
Written and Created by PaperCraftCentral Susan
Would you like to know how to make envelopes for your handmade greeting cards? Here's a way!
"Letters are expectation packaged in an envelope."
~Shana Alexander
Knowing how to make envelopes for your handmade greeting cards is a definite advantage, especially when we papercrafters often make custom sized cards that just don't fit the Post Office standards.
I have spent a lot of time hunting for just the right sized ones in the shops, only to come home disappointed or with a compromise.
Not any more! Now I can make any sized envelope for my cards that I wish, within reason.
You could use a template, but sometimes even templates are not the right size, so here's a way to customise your work to suit your card.
NOTE: If you are looking for the Envelope Punch Board, however, scroll down to read a little about that fantastic Stampin' Up! tool that is now retired.
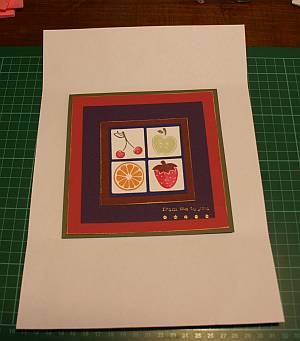
Here I made a square card. It is 15cm (about 6") square. Naturally I had no ready made envelope in stock, so I got to work making my own.
How to Make Envelopes That Fit Your Project
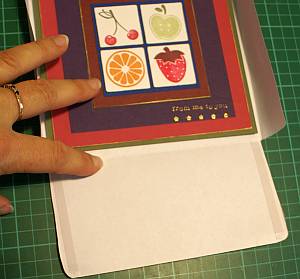
For my square card, I took an A4 sized sheet of printer paper (a normal sized sheet of printer paper) and placed it on my desk. Then I placed the card itself on the paper and folded up the bottom towards the middle, and folding the top down towards the middle too.
My aim was to have the top flap overlap the bottom one by about 2cms (1").
In this case, my card was too big for me to do that. Some cards are wider one way than they are the other, so you can often turn them another way to overlap the paper, but in this case with a square card, that was not going to be possible.
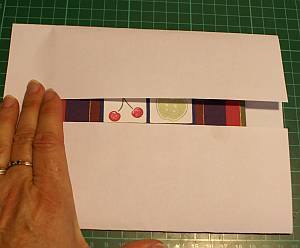
As my paper was too short as it was, there was no problem. I simply made a border to 'stretch' my paper!
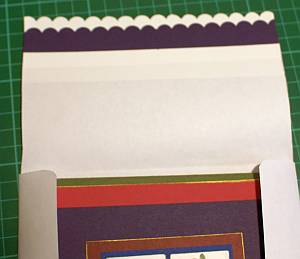
I cut a piece of paper the right length to allow the overlap I wanted, then decorated it with a scallop border punch and some stamps.
Then I adhered it to the inside edge of the top fold with double-sided tape.
You could of course adhere it on the outside. This was just the look I was going for on the day.
While you have the cardstock element unattached, you could also emboss it with an embossing folder if desired.
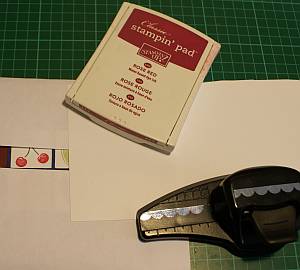
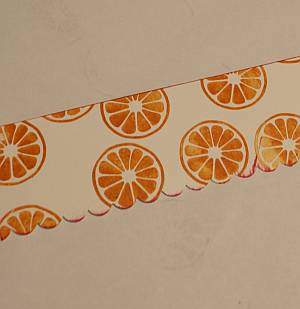
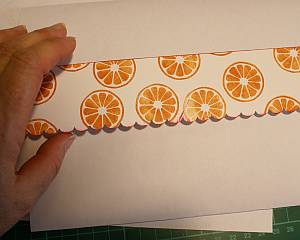
After I made my extension piece, I put the card back in the middle of the paper and opened it out.
Then I folded the sides towards the centre to enclose the card just right (leave a little bit of room for the card to slide in and out easily).
Then I opened out the whole page again and drew in the flaps by following the fold lines, and gently rounding the corners. It's a simple matter to cut the extra bits out then as shown in the series of photos below.
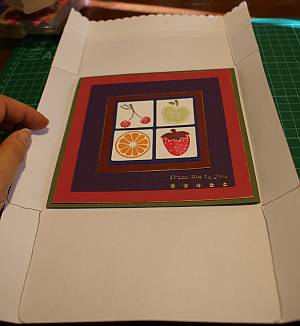
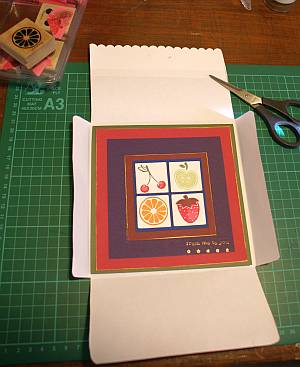
Next, add some double sided tape to the bottom flap so that when you fold it up, it will adhere to the folded in sides of the envelope
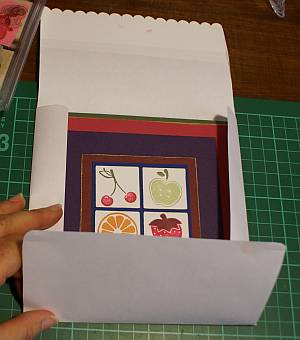
Almost done!
Either continue decorating the inside of the envelope if you wish, or leave it as it is and leave the flap without adhesive, or add in some double sided tape to the top flap so your envelope can be sealed.
As you can see, I decided to add a little scalloped edge to the inside of the top flap. (See the top picture)
You could also add a longer piece of designer series paper to the inside to make a lined envelope. You only need it to cover the inside front flap and go down behind your card.
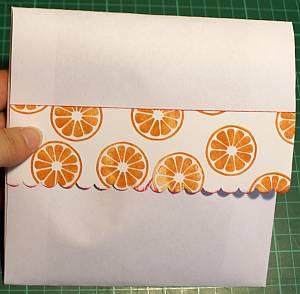
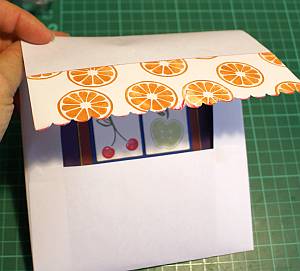
You can see how you could customise your envelope to any sized card with this tutorial to help you, I hope.
Envelope Punch Board
I can show you another way how to make envelopes.
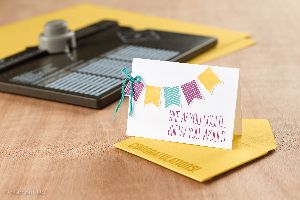
If you would like to have an accurate tool to help with making envelopes of many different sizes, Stampin' Up! used to have an Envelope Punch Board in their inventory. Other manufacturers still make them, so you can probably find one by searching with Google.
It is a marvelous little gadget and I use mine quite a lot. It will take 12" x 12" pieces of designer series paper or cardstock too, so give it a try if you would like to have a lot of custom sized envelopes in a jiffy.
The instructions and sizes for the envelopes are written right on the tool itself.
Have fun making your own envelopes, whichever of these methods you choose to try!


New! Comments
Have your say about what you just read! Leave me a comment in the box below.