- Home
- Papercraft Adhesives
- Creating Pierced Patterns
Paper Piercing Tutorial
Written and Created by PaperCraftCentral Susan
You can add so much to cards and papercraft projects with paper piercing.
"Creativity is piercing the mundane
to find the marvelous."
~Bill Moyers
I use my tools and mats quite often to make lines of paper holes to embellish my handmade greeting cards.
This technique can be just right for when you feel a card 'needs'
something more but you can't quite decide what that something is.
You can also use these techniques on scrapbook layouts, on different mediums like light aluminum, thin chipboard elements, foiled elements, designer series paper and leatherwork.
There are probably more mediums you could make a pierced line on as well.
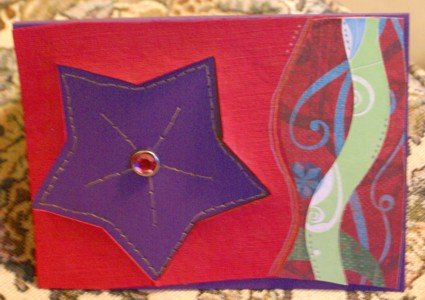
Paper Piercing Tutorial
You could be using this technique for your handmade cards and scrapbook pages in a hurry after reading the following little tutorial. Crafting techniques are often simple once someone explains how they are done!
You will need:
- A card base 6" x 12" (30cm x 10.5cm) scored down the middle but not folded
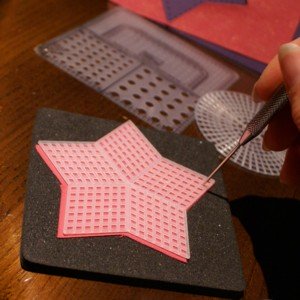
- A Take Your Pick Tool from Stampin' Up! or similar which is a hole reamer with a fine tip, sort of like a thick needle. (The Take Your Pick Tool is a multipurpose tool that allows you to score, cut, shape, rotary cut and more. Today we are just talking about the bit that pierces holes.)
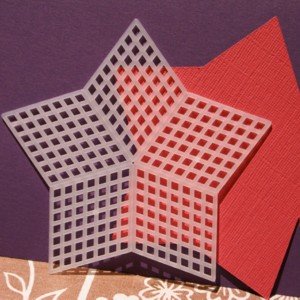
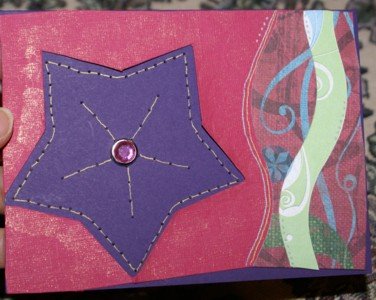
- A template. Here I used a star shaped one I got from a sewing shop but you can use circles, squares, oblongs, or just lines or rows of lines
- A self healing cutting mat
What to do:
- Decide where you would like to place your lines of perforations
- Open the card blank or prepare a shape to be embellished. WARNING: If you leave your card closed you will wind up putting holes in the front AND the back of the card base so do just work with one layer of cardstock if that is where you want the holes to be
- Position the card you want to embellish over the mat right side up, and place the template over it where you want to place the lines of holes
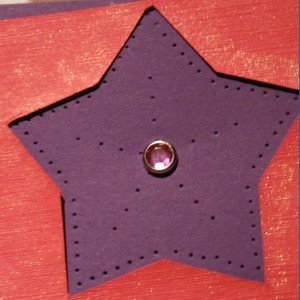
- Take your paper reamer/Take Your Pick tool and punch even holes in the cardstock, using the template as a guide
Other ideas to try:
You don't need a commercial template to make a paper pierced project. You can do it freehand if you want to and see if the effect pleases you.
If you want more guidance, try using a metal ruler with measurements on it to make a straight line of evenly spaced holes.
Make your own template by drawing a shape onto a Window Sheet, cutting it out, and piercing holes in it with the help of a ruler so you can use it on a project forever after.
If you want a curved or circle pierced line, try using a drinking glass or saucer to see the arch on your project, then piercing evenly around that shape.
Other ideas to try:
- Make double or triple rows of piercings
- Vary your piercings. Punch some holes in a line and then leave a gap before making any more
- For a spikier and tactile effect, punch the holes on the wrong side of the cardstock
- Ink the spikier holes after you have made them
- Draw lines between the holes to resemble stitching. A white gel pen is very effective on dark cardstock and vice versa, or use metallic (gold, silver, copper) pens to make the 'stitches' show up
- Create a 'running stitch' effect by drawing a line between every second hole like this ._. ._. ._.
Even More Things to Try
Once you have started I believe you may find many uses for this embellishment technique. It will be another skill you can readily incorporate it into your regular papercrafting repertoire at will!
If you enjoyed this technique, you may like to try custom colouring your own ribbons or you might enjoy making a blackboard card.


New! Comments
Have your say about what you just read! Leave me a comment in the box below.