Papercraft Ladies
Written and Created by PaperCraftCentral Susan
Get out your punches and make some papercraft ladies for a laugh!
"I have bursts of being a lady, but it doesn't last long"
~Shelly Winters
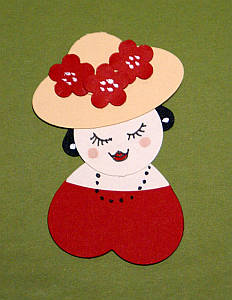
Do you have a secret yearning to make paper dolls? Or are you an
aspiring fashion artiste perhaps? Maybe you are looking for a papercraft
idea and would like to make a special set of character ladies for your
next scrap swap or get together? Maybe you could use these girls to fund
raise for breast cancer awareness?? I can also see them being relevant at a Red Hat Society meeting!
If you already have a punch art idea for making little characters, please do share! Scroll to the bottom of the page for a place to show it to me?
Whatever you would like to use them for, making Hearty Ladies can lead to lots of laughs and conversation, and who doesn't like that?
I made a couple of papercraft ladies to show you how to make them. The first was this demure creature you can see above, then I decided I would make a slightly less demure damsel. Here's how to make your own.
How to Make Papercraft Ladies
You will need the following punches or dies.
Most of these punches are available from my SusanSalutations Store or from your own local Stampin' Up! Demonstrator if you need to order them.
I will link you to some of the punches in the instructions as I mention them, but do check out the punches section on the site to see what current punches and dies are available. You might even like them better!
- Two big Heart shapes of equal size, one for the body (I used Very Vanilla cardstock) and one for the bodice (I used Bravo Burgundy cardstock, now retired. The heart shaped punch I used is now also retired, but you could use a nested heart die. Choose the second smallest perhaps?), and a tiny heart for the sunglasses. I used the heart from my Owl Punch (retired) for that.
- An Oval punch for the hat brim. I used the Small Oval punch (retired) but the Double Oval Punch I have linked you to will work..
- Two sizes of Circles, a 1" one for the head and 1/2" one for the hat crown
- Flowers if desire. I had a small punch from the retired Itty Bittys punch set.
You will also need some rhinestones or other embellishments and a few Stampin' Write markers, some sharp scissors, adhesive and a flower shaping tool, though pressing a punched circle with your thumb or the top of your green Tombow Glue into the palm of your hand may do just as well.
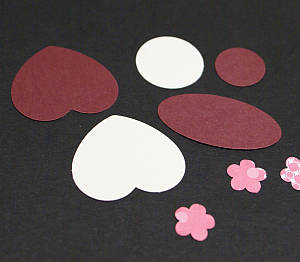
Here's What to Do:
First, cut or tear the coloured large heart shape to make a bodice for your lady. I chose to tear mine and roll/distress the neckline a bit more. The lady I was making likes grunge!
I then shaped both pieces a little with my flower shaping tool and thumb in the palm of my hand.Remember the top of your Tombow Multipurpose Liquid Glue bottle will also work.
Adhere the top to the other intact, upside-down heart shapethat was punched in Very Vanilla or some other skin tone of your preference.
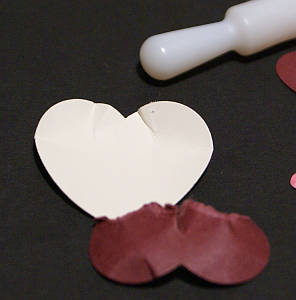
Then shape the body a little and adhere the decorated bodice and the 1" head circle thus so they overlap and create a body and neck:
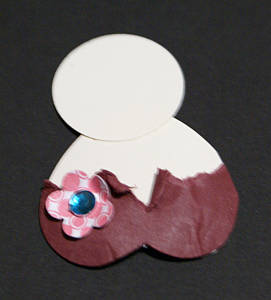
Now shape the oval into a hat and distress/tear the edges. I cut a slit in the hat to allow the placement of the crown which was made with my 1/2" circle punch. This was to let the hat fit over the head circle shape.
You can use this idea when making any kind of paper hat that you want ot go on the head of a paper punch project:
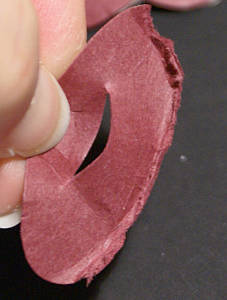
I adhered the hat together then glued it to the lady's head.
After that I cut out a small heart and sliced the pointy end off to make her sunglasses, and added them:
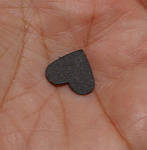
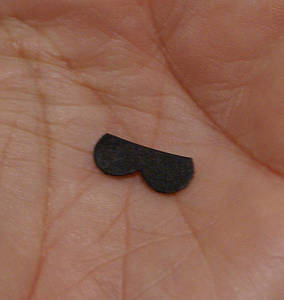
Add some accents with a white gel pen to make the glasses look shiny, (make them even shinier with your Fine Tip Glue Pen), and draw in the lips and a few other little details with your Stampin' Write! markers:
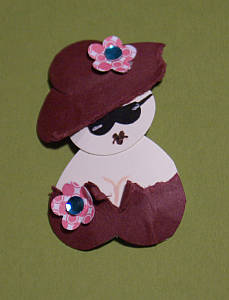
And there she is, my Hearty Lady in sunglasses! She would make a lovely card topper or accent for a layout, don't you think?
In fact, if you would like to purchase a Hearty Lady or two, you may just find one in my Etsy Shop, though maybe not as they have been so popular I may be sold out.
But if you make your own papercraft ladies, I would just love to see them. I hope you will share your punch art with me so I can see your ladies' expressions.
Do You Have A Favourite Handmade Card to Share?
Do you make greeting cards? Please do share it with me.
Return from Papercraft Ladies to Card Making | Return to PaperCraftCentral Home Page


New! Comments
Have your say about what you just read! Leave me a comment in the box below.