- Home
- Papercraft Adhesives
- This Page
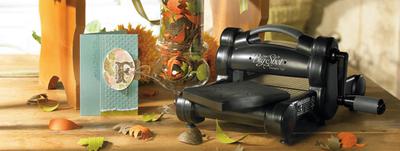
Crease Pads in the Big Shot or Cuttlebug
by Suzanne
I'm new to embossing / die cutting (loving it!) I purchased a die that said it needed an embossing mat.
Where do I put the embossing mat in the "sandwich" stack that I run through the Cuttlebug?
Suzanne
Hi Suzanne
Welcome to the world of embossing/die cutting! I just love using embossed and die cut elements in my projects too! I use the Big Shot of course, but I started out with a Cuttlebug, and the same rules apply for both machines when you are using various tools to assist with getting good results.
I am wondering if your embossing mat is a crease pad?
We recommend the Premium Crease Pads and Extended Premium Crease Pads when using rule-based dies with score lines. The crease pads provide a flexible cutting surface that produces clean cuts and well-defined score lines. When using the crease pads, you should layer your sandwich to pass through the Big Shot (or Cuttlebug) in the following way (starting from the bottom):
Standard or Extended Cutting Pad
Shim (optional)
Die, blade up
Material to be cut
Premium or Extended Premium Crease Pad*
Shims are used to add thickness to the sandwich passing through the Big Shot machine, applying more pressure to the die and resulting in deeper score lines and embossed images. Plastic shims are included with each crease pad, but you can also use text-weight paper or card stock as a shim.
The necessity of shims will vary among users. Due to the tolerable variances in the measurements of all products associated with cutting, results can slightly differ depending on the material being cut, the die being used, or even from one Big Shot machine to another. You should experiment to identify what works best (shim, no shim, extra shim, etc.) for the material you are cutting and the die you are using.
*Use the Premium Crease Pad with Originals or Bigz dies. Use the Extended Premium Crease Pad with Bigz XL dies.
I hope this information helps you, Suzanne. Let me know if you have more specific questions about it all, and enjoy your embossing and die cutting!
Susan
PS: You might also enjoy seeing some embossed effects I used on some of my cupcake cards and did you know you can also use embossed images and a brayer with some ink to make some interesting coloured effects?
Join in and write your own page! It's easy to do. How? Simply click here to return to Ask Susan!.
Flat Paper Trimmer Cut
by Virginia
(Walstonburg NC, USA)
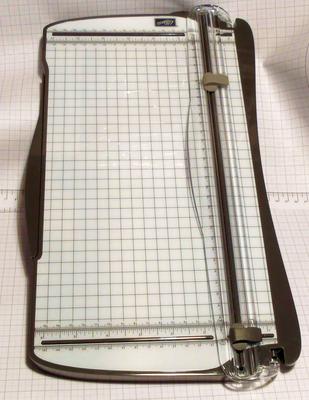
Stampin' Up! paper trimmer
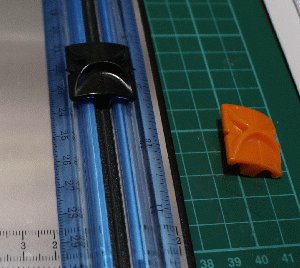
I found this site on a Google search because I have a question that has bothered me awhile. It's about the edges of cardstock after I make a cut with my Fiskars paper trimmer. The edges are not fuzzy, as seems to be a common problem. Rather the cut edge seems a bit sharp; when I turn over the cardstock, the cut edge is not exactly flat ... it is very slightly raised. I hope I have made this description clear and you can give me some advice on getting a clean, flat cut. Thank you very much.
Hello Virginia
Thank you for stopping by PaperCraftCentral.com to ask your question.
Paper trimmers are sometimes hard to use, it seems. I had a Fiskars trimmer once and decided to switch to a Stampin' Up! one, but all trimmers still have problems at times, either due to the way they are being operated, or to some other mechanical fault like a dull blade or a warped blade arm. First check that the blade is still sharp and the blade arm is not warped. If all is good there, try this next step.
One thing that does seem to happen with most trimmers is that you get the very effect you have described. This can be because we apply pressure as we cut, and the weight of the pressure and the blade itself bear down on the cardstock together, causing it to curl under slightly. The design of a trimmer will usually make this happen if much pressure at all is used when cutting. If you have not already tried this, see if allowing the blade to glide through the cardstock without any unnecessary pressure will help you get a better result.
The only other suggestion I have is to switch tools again. Try using a guillotine cutter. The blades are much heavier but they cut on an edge rather than in a groove, so the paper tends to come out flatter when cut. You need to be sure the blade is sharp on a guillotine and it is best to buy one with a safety guard so no one gets chopped fingers or arms. The blade is sometimes left in the upright position at my house and it can cut/scratch arms. Don't ask me how I know 🤔.
I hope one of these ideas will help you with getting the result you want. Come back and tell me how you do.
Susan
www.papercratcentral.com
You might also like:
Join in and write your own page! It's easy to do. How? Simply click here to return to Ask Susan!.
Paper cutting tool on your site
by Tracy
(California)
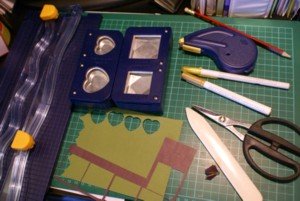
Tools from Susan's desk
Hi,
There is a picture of a paper cutting tool that makes wavy lines. I can't seem to find this tool anywhere. What brand is it and where can it be found, and what is it's exact name?
Thanks so much, your site is very inspiring.
Hi Tracy
Thanks for writing :) I was wondering, is the tool you mentioned in the photo I put above your message? If so, it is called a 12" Decorative Trimmer. I think I got this tool from Creative Memories about five years ago. I'm not sure if they are still available in that form but you may find one on eBay?
Thanks also for your feedback about my site. It really made my day!
Happy crafting
Susan
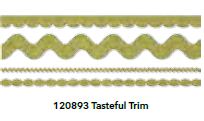
PS: There is a Big Shot die called Tasteful Trims that can make lovely wavy lengths that can be used on cards and scrapbook pages alike. It is pictured above. You can see it on page 160 of the 2011/2012 Stampin' Up! Australian Idea Book and Catalogue and order one from me if you live in Australia.
Join in and write your own page! It's easy to do. How? Simply click here to return to Ask Susan!.
