- Home
- Papercraft Adhesives
- Scrapbook Embellishments
Scrapbook Embellishments
Written and Created by PaperCraftCentral Susan
Would you like to make your own Scrapbook Embellishments?
"Creativity is inventing, experimenting, growing,
taking risks, breaking rules, making mistakes,
and having fun."
~Mary Lou Cook
Making your own handmade paper embellishments for your layouts need not
be as daunting as you might think. You can wind up with a unique
decorative element that really fits in with your page, and it's an
economical way to craft as well.
Ways to Make your Own Scrapbook Embellishments
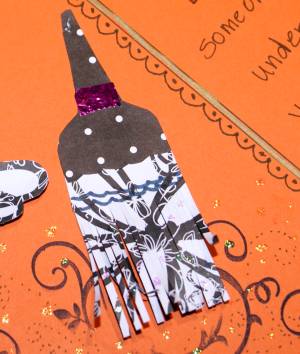
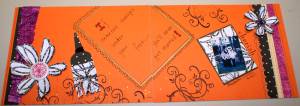
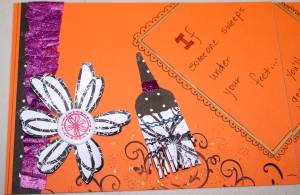
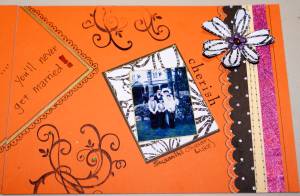
Sometimes you can't find a store bought element that really fits in with pages you are making. On this occasion I wanted to make a little broom to suit the pages I made about an old wives tale. I could not remember seeing a commercially made broom shape in any craft shops, and I really wanted to feature one on these pages for obvious reasons. My quote says:
"If someone sweeps under your feet
you'll never get married"
I remember my mother telling me that many times in my youth as she playfully swept under my dangling feet while I sat in a chair. Incidentally, I disproved the old wives tale for her when I married my husband :)
Many shapes are really combinations of common shapes like circles, rectangles, squares, triangles and hearts. Really look at the shape you want to create and see if you can break it into some of these common shapes. Then measure out and draw those shapes, or punch them out, or go ahead and cut them freehand if you are happy to do that, and adjust them to make the item you want.
So How Is the Handmade Scrapbook Embellishment Broom Made?
You Will Need:
- Patterned designer paper for the broom bristles
- Plain paper or cardstock for the broom handle and top
- Pencil, scissors, acid free marking pens and adhesive, and I used a little foil
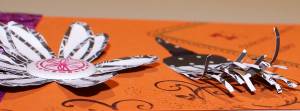
I made a rectangular shape for the broom bristles out of the patterned designer paper, then rounded the top corners. I then cut straight lines close together for the bristles, leaving the paper joined at the top. I wove my scissors through every second bristle and curled them one way, then flipped the broom over and curled the remaining bristles in the opposite direction. I thought this made the broom look more real and also added a 3-d effect to my pages. I made the flower 3-d as well just as I did on the paper flowers page. If you have them, you could use fringing scissors for this part. You can buy such scissors and many other supplies used here (if they are still available) from my Stampin' Up! store.
Next I made another rectangular shape with rounded top corners to fit over the top of the bristles, scalloping the bottom edge a bit. I also cut out the handle shape at the top of the rectangle. After adhering this to the top of the bristles, I added some 'stitch' lines with a marking pen. I added some foil wrapped round the handle and top of the broom to add some extra visual interest.
To Finish The Effect:
I stamped a flourish or two on the layout to make it look like broom dust, adding a few spiraling lines of dots to enhance the dust effect. Some Kindy Glitz sparkle added to the page and the broom bristles completed the whole thing.
And there you have it - a hand made custom designed scrapbook embellishment. It matches my layout, took minutes to make and cost next to nothing.
If you make some decorative elements of your own, I would love to see them. Please feel free to upload them.
Do You Have Scrapbook Page to Share?
Please do share your scrapbook layouts and projects below.
What Other Visitors Have Said
Click below to see contributions from other visitors to this page...
Iris Folding on a Layout Not rated yet
I used Iris Folding on an album page layout and think it added a lot to the page. I was pleased with the result!
Vanessa
*****
I think …
Return from Scrapbook Embellishments to Scrapbooking Tips | Return to PaperCraftCentral Home Page


New! Comments
Have your say about what you just read! Leave me a comment in the box below.