- Home
- Papercraft Adhesives
- Crayon Resist Technique
Crayon Resist Technique
Written and Created by PaperCraftCentral Susan
Cards made with the crayon resist technique often yield beautiful results that can impress people into asking if your creation was store bought instead of being hand made.
"Artists are just children
who refuse to put down their crayons".
~Al Hirschfeld

This technique is relatively simple to master and may only take a couple of practice sessions for you to get quite beautiful finished images to use in your handmade greeting cards. It almost reminds me of a watercoloured look.
This was one of the first
techniques I learned about when I first started papercrafting and it has
remained a favourite of mine.
And all you need is some simple additions to your usual papercraft supplies!
How to Make Cards with the Crayon Resist Technique:
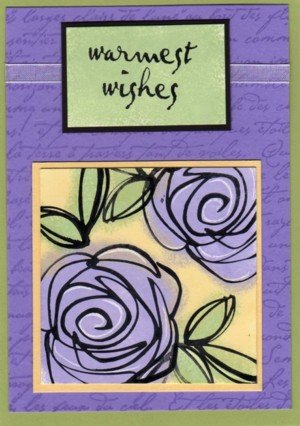
Here's how I made the sample card shown above. Please note the stamp set is no longer available. Use any large and kind of open flower stamp to create a similar look:
You will need:
- Glossy white cardstock
- Stamps of choice
- Pigment Ink colours of choice
- Permanent black ink (Stazon or Memento)
- White wax crayon or thin white candle (birthday cake candle?)
- Sponge dauber(s)
- Tissue
- Start with a piece of glossy white paper. Choose your image and stamp it onto the paper with a Stazon or Memento (permanent) ink so it will not be smudged as easily during the sponging process. Make sure your ink is completely dry on the paper before going to the next step.You can heat set it with a heat tool to be sure it is dry.
- Using a white or light coloured wax marker such as a crayon or a wax candle, draw on the image so that you highlight certain parts of it. No ink will wind up colouring the waxy lines you apply to your stamped image. The wax protects the paper from the ink, sort of like it does on material when you are making batik. In this case I highlighted the edges of the petals of the stamped flower image in white.
- Use a sponge dauber to apply colour to the image with ink colours of your choice. Here I have used one colour for the flower, one for the leaves and one for the background. You can of course add more colours or use fewer as you wish. See how the ink stays off the wax and highlights that part? And the black outline stays crisp.
- Wipe over your finished work with a tissue to remove any inky residue and wax if desired.
- Now you can trim up your finished image and use it on a handmade greeting card.
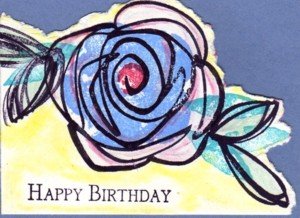
Below is another example of how to use this great technique, incorporating the torn paper technique as well.

More ways to use the Crayon Resist technique:
- Try this technique with a large background stamp.
- Highlight the edges of a solid line image stamp or draw a pattern on it before inking the image on paper.
- Add 'snow' to your stamped tree branches with a white crayon.
- You can even free-hand a drawing with a crayon then add ink over the top. I have seen spider webs done that way, for instance.
- Make a series of slanted dashes with your crayon across a stamped image to make it look as though it is raining.
- Use your crayon to add bubbles to your stamped fish images to make it look as though they are really under water.
- Crayon the petals of a daisy flower completely before inking over the top of the image so they stay a purer white.
- Try using paint or spritzers of colour over the top of crayon for a different look.
Now you may want to try another cardmaking technique. May I suggest the Faux Velvet, the Faux Silk or the Faux Suede techniques?
If you make a card using the crayon resist technique, please do let me see your work!
Do You Have A Favourite Handmade Card to Share?
Do you make greeting cards? Please do share it with me.
What Other Visitors Have Said
Click below to see contributions from other visitors to this page...
Pen and Ink Flower Border with Butterflies 


Freehand pen and ink border with butterflies cut from material and glued to lightweight cardstock. After drying, they were cut out and glued to the card …
Flower and Butterfly card front 


Painted on papyrus paper with Jacquard Lumiere acrylic paints.
Pat
Oh my, Pat, that is a lovely card front. It must look spectacular …
If you liked this technique, you may like to try the Black Magic technique, the Chalk Pastel Technique or the Faux Metal technique next.


New! Comments
Have your say about what you just read! Leave me a comment in the box below.